14.1. Autopsy Integration
Autopsy is an open source, general purpose digital forensics tool (that we also maintain). There are two ways that Autopsy and Cyber Triage can work together:
Autopsy can open Cyber Triage Incidents
Autopsy can query the Cyber Triage malware scanners
This page covers the feature to open Cyber Triage incidents in Autopsy. More information on the malware scanning module can be found here.
14.1.1. Open a Cyber Triage Incident in Autopsy
14.1.1.1. What Does The Integration Do
This integration allows you to open a Cyber Triage incident in Autopsy (as a case). You may want to do this to do a deeper dive on the collected data. For example, you can do a full text keyword search in Autopsy.
This integration is a work in progress. The below table provides details of what does and doesn’t work. The key requirements at this point are:
Only works in Standard and Standard Pro
Only one of Autopsy or Cyber Triage can be open at the same time (they are accessing the same SQLite database).
Capability | Supported |
|---|---|
Supported Cyber Triage Versions | Standard and Standard Pro |
Keyword search in Autopsy | Yes (3.8+) |
Timeline in Autopsy | Yes, but it is rebuilt (3.8+) |
See Autopsy-created data in Cyber Triage | Partial (as of 3.8) |
View all files from disk image in Autopsy | Yes (3.8+) |
Run Autopsy and Cyber Triage simultaneously | No |
NOTE: If you import a disk image into Cyber Triage, then only a subset of the files would have been brought into Cyber Triage. If you open that same incident in Autopsy and it still has access to the disk image, then you will be able to see all files.
14.1.1.2. Setup Steps
Before you can open an incident in Autopsy, you need to configure Autopsy.
14.1.1.2.1. Install The Import Module
You need to first install a module so that Autopsy knows about the concept of a Cyber Triage incident. You can get the Cyber Triage Autopsy Importer plugin from within Cyber Triage.
Open Cyber Triage
Open the options panel
Select the Integrations tab
In the Autopsy section, click the ‘Export Plugin’ button, and select a directory to export the plugin file to.

Next, you need to import that module into Autopsy. Close Cyber Triage first.
In Autopsy:
Go to the ‘Plugins’ menu under ‘Tools’.
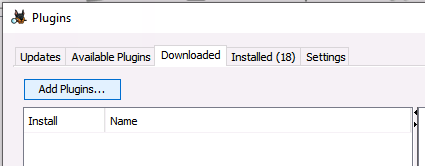
Go to the ‘Downloaded’ tab, and click ‘Add Plugins…’.
Navigate to the NBM file that you exported from Cyber Triage.
Select the plugin and click ‘Install’.

More general information on installing Autopsy plugins can be found in the Autopsy User Guide.
14.1.1.2.2. Update Data Folder (optional)
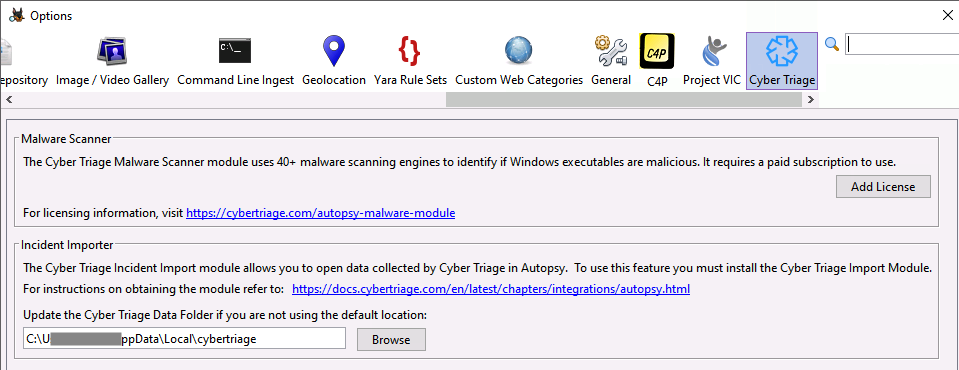
If you changed the Data Folder for you Cyber Triage installation, you’ll also need to configure Autopsy to look there for file content. Most Cyber Triage users do not change their data folder and therefore do not need to make changes in Autopsy
However, if you do, then go to the Autopsy Options panel and choose the ‘Cyber Triage’ tab. You can pick a new Data Folder from there.

14.1.1.3. Usage
There are two steps required to open a Cyber Triage Incident in Autopsy:
You need to create an Autopsy Case file for the Cyber Triage Incident (only needs to happen once per incident).
You then open the case file in Autopsy (as many times as you want).
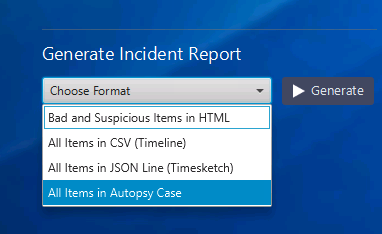
To create the Autopsy case file, open the incident and choose the ‘All Items in Autopsy Case’ report menu option. Select a directory to store the Autopsy case folder in. Cyber Triage will make a folder with a “.aut” file in it.

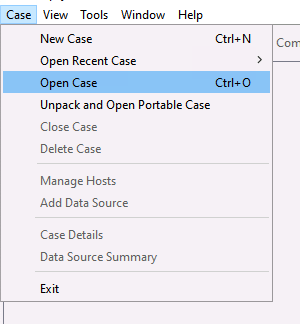
Next, close Cyber Triage and open Autopsy. From Autopsy, you should now be able to open the exported case as though it is a normal case. If you get an error about a missing file repository, then ensure that the Import NBM is installed.

NOTE: The import module will need to populate the Autopsy timeline database, which will happen when each time Autopsy is opened after Cyber Triage added a host.