3.3.1. General Concepts
There are some concepts that apply to all Add Host methods.
3.3.1.1. Update Threat Intelligence
Some forms of threat intelligence must be configured in the Options panel before you can start the add host process. These include:
Yara (Configure Yara Signatures)
Good/Bad Lists (Configure Bad and Good Lists)
These are applied as soon as data starts coming in. So, ensure they are up to date before adding a data source.
3.3.1.2. Specifying An Incident Reference Date
All hosts in Cyber Triage have a reference date that represents when you were roughly first suspicious about it. By default, it’s the date of collection. When you add a host, you can override it by choosing Custom Date instead of Use Collection Date. You should do this only when the collection happens many days or weeks after an alert.

The reference date is used to decide what to collect and what defines “recent changes” or “recent activity”. Activity close to that reference date (before or any time after) will be considered “recent”.
If not explicitly specified, the collection date is used as a reference date.
Cyber Triage uses a 30-day window before the reference date, so if this date is off by a few days, it is not that important.
You should pick this based on data available to you. Do not simply subtract 7 days from every alert because you assume the attack started a week before.
3.3.1.3. Queueing Up Data
If you have a Standard Pro, Standard Enterprise, or any Team version of Cyber Triage, then you can add more than one host at a time. Cyber Triage has a scheduler that will process hosts as resources become available.
You can queue up hosts in two ways:
Many of the “Add Host” UIs will allow you to add multiple files or hosts in a single step. The set of files will get added to the scheduler.
When you add a host and others are already being analyzed, the new host will get added to the scheduler.
Note
You cannot add a “Local Disk” to the queue because there is the risk that the image is unmounted or the removable media is unplugged.
At any point, you can see the status of the queue by choosing Processing Queue from the left-hand navigation on the Home screen. Recent Hosts is listed right below it, and shows hosts you’ve recently added or opened.
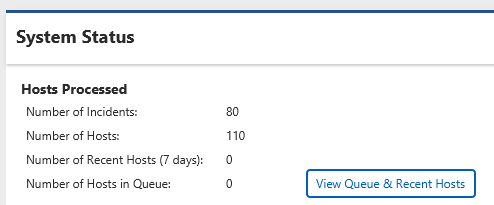
Incident Overview - Queued Data
3.3.1.4. Location of Processing in a Team Deployment
If you have a Team Server, it’s important to understand what work is being performed on the server versus the client:
Web Application (thin client): Your web browser will do no analysis. It can only upload local JSON files or notify the server that it should process data that the server already has access to. See Server Accessible Data Source Folder.
Installed Thick Client: If you install a client, then it can locally process disk images, memory images, and local disks. The client needs to stay running until all of the data has been uploaded to the server. See Install and Configure Cyber Triage Clients.
Server: The artifacts (JSON output) are always analyzed and scored entirely on the server.
3.3.1.5. Specifying Data Collection Types
When adding data into Cyber Triage, you will at some point be prompted for what kinds of data to extract and import. This may happen when you launch the Collector or when you import a data set. For example:
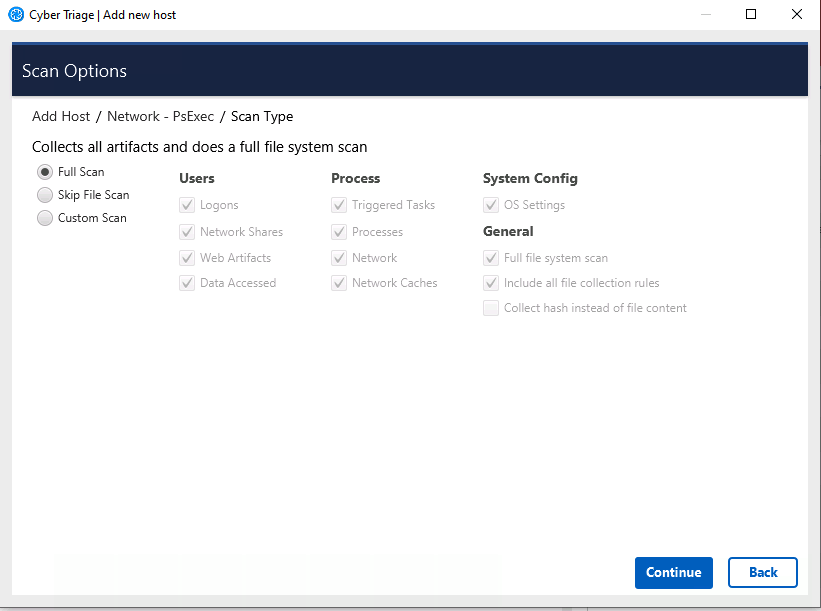
The data types listed are based on Information Artifact Types. You can choose to collect the underlying files and artifacts for them.
Additional settings often include:
Full File System Scan: Scans each file on the system, collects metadata, and the file content if they are suspicious. This is the most time intensive step of the collection process.
Collect hash instead of file content: This will calculate the hash values for EXE and DLL files and save those instead of the full file content. This makes the collection smaller, but also means that the file can not be uploaded for full malware analysis.
The Collector will also make copies of various application-specific logs and configuration files, if they exist.
The data types and above settings are grouped into profiles:
Full triage collection: The default, which includes all of the types listed above.
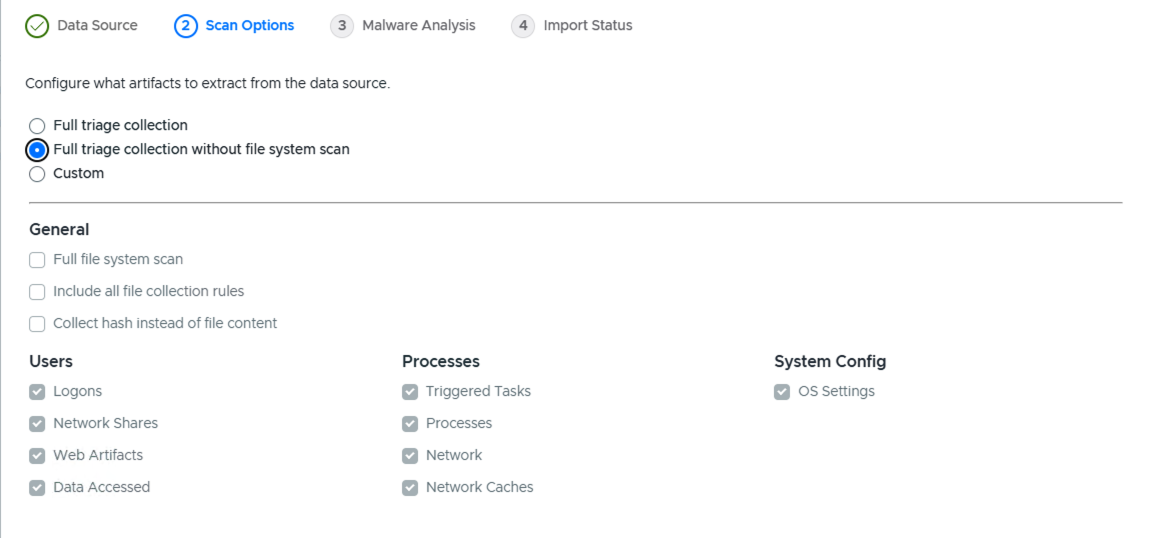
Full triage collection without file system scan: This skips the file system scan, but gets the rest of the artifacts. This is much faster than a full scan.
Custom allows you to pick and choose.
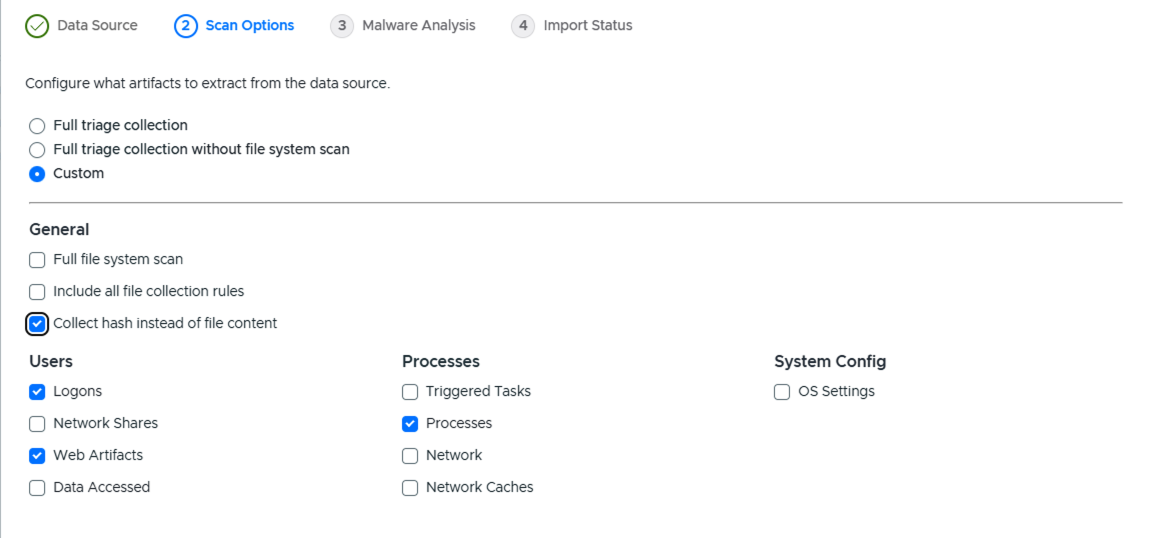
The Collector will, by default, copy the file content for all executables, libraries, and other files that are referenced by the other artifacts. Executables and DLLs signed by Microsoft are not collected and instead only the hash values are.
3.3.2. Ingest-Time Settings
After you specify the data you want to import, you will be prompted to configure: