3.4. Automated Analysis
While data is being imported into Cyber Triage, the automated analysis begins. The artifacts traverse down automated analysis pipelines so that they can be scored as Bad, Suspicious, Good, or Unknown.
Cyber Triage uses various sources of threat intelligence to score the artifacts. This section outlines the various methods and configurations that maybe required.
3.4.1. Ingest-Time Settings
Regardless of the method used to get data from the target system into Cyber Triage®, you will need to decide at some point about how to detect malware.
3.4.1.1. Malware Analysis Settings
Before the ingest starts, you will be prompted to choose how the files will be analyzed for malware.
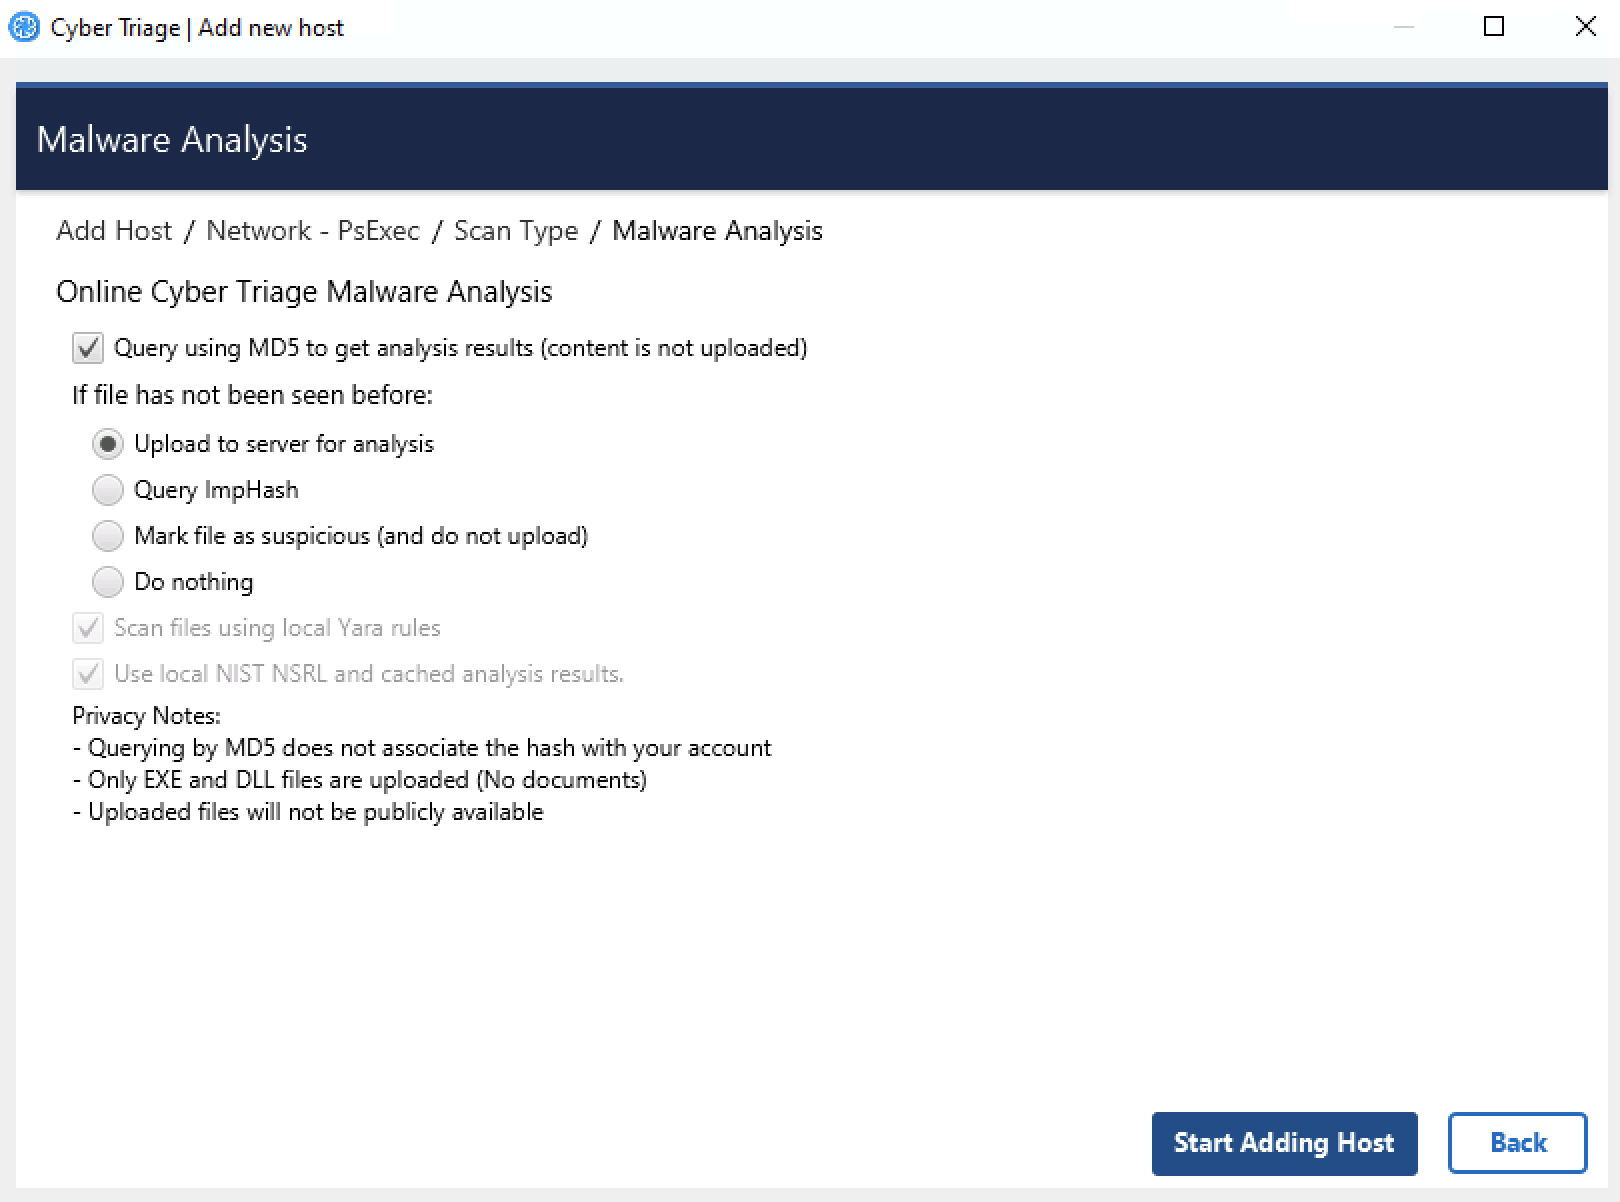
Malware Analysis Options
Cyber Triage® uses its Online Malware Analysis Service to analyze files for malware. This service uses ReversingLabs, the NIST NSRL, and other sources to assign a score to each file.
You need to configure what data is uploaded. See Host-level Examination for details on how these results are used.
Upload MD5 hashes: This will send only the MD5 hash of your files to the service. If the service knows that the file content is associated with malware, then it will identify it as such. Note that any minor change to malware will change its MD5 and it will not be flagged as malware using this technique.
If the file’s hash is not known to Cyber Triage, then you need to decide which of the four that you want to do:
Upload file content: This will send the full file to the service if the MD5 value was not found. It will be scanned and a result will be returned. The raw content will not be visible to others. The analysis results will be available to other ReversingLabs customers though if they happen to query for the same hash value.
Query with ImpHash: This will use a fuzzy match algorithm called ImpHash, which is based on executable import tables, to look at similar executables that were already analyzed and identify if any of them were identified as malware.
Mark unknown file as suspicious: If the file was not known to the service and you do not want to upload file content, you can choose to have those files marked as suspicious so that you can be aware of them and decide that they are worth additional analysis or ignored. You will have the option to upload individual files afterwards by right clicking on them.
Do nothing: Ignore the unknown files.
If you use Cyber Triage® on a computer not connected to the Internet, then you have two options:
You can export hash values and manually submit them to the online service using a website (Advanced Topics)
You can use a local copy of the NIST NSRL to ignore known files (see Advanced Topics)
Note
To scan files using the Recorded Future Sandbox malware scanning service after your collection is processed, see Scanning Files in the Recorded Future Sandbox. Note that this service happens after the data has been processed and has different privacy terms than the above methods.
3.4.1.1.1. Common Privacy Questions
Because some responders are sensitive about uploading files and how it could be associated with them, here are some notes about common questions:
When you query by MD5 or ImpHash hash value, there is no link stored between your organization and the hash value.
Only EXE and DLL files can be uploaded. This reduces a PII leak risk.
No one else can download the uploaded files.
Only other commercial ReversingLabs customers will have access to the analysis results if they query based on hash value. ReversingLabs does not have a public API.
3.4.1.1.2. ImpHash Results
ImpHash is a fuzzy matching algorithm that can be quite powerful if you do not want to upload content. But, it is not as precise as using a cryptographic hash such as SHA-256 or MD5.
ImpHash works by looking at the “import table” of an executable file. This is where the file lists out which DLLs it is going to depend on. The theory behind ImpHash is that attackers may change a few bits in the file, but the import table stays the same. So, you can find variations of an attacker’s tools by relying on its ImpHash value.
Cyber Triage uses ImpHash to query Reversing Labs and it will return a list of SHA-256 hashes of files that it knows about that use the same import table. Cyber Triage then queries for the results of those files to see if any were previously identified as malicious.
There are some caveats:
There are some ImpHash values that are shared by tens of thousands of files. Cyber Triage is not getting the results for all of those files. You would go through all of your hash lookups. Cyber Triage will examine a subset of them. In our experience, .Net applications will end up with the same ImpHash value.
It is possible for some files with the same ImpHash to be identified as Bad and some as OK. In that case, Cyber Triage will mark this file as suspicious and the message will say what percentage of similar files were scored as bad.
3.4.2. Executable Malware Analysis
A Cyber Triage license comes with access to 40+ malware scanning engines through our Internet-based API. You will be prompted to use this for each host that you add. Our API is backed by Reversing Labs.
3.4.2.1. Initial Setup
The only setup steps required for this feature is to ensure that the computer running Cyber Triage can access the cloud-based API. Refer to Network Traffic (Ports and Hosts Used) for specific host names.
If you are offline, you can manually upload file hashes. See Advanced Configuration.
3.4.2.2. Per Host Configuration
When you add a host, you will prompted for what malware scanning settings you want to use. Refer to Malware Analysis Settings for more details.
3.4.2.3. What is Analyzed
Not all files from a host are sent for malware scanning. Only the following are:
Executable PE files, such as .exe and .dll files
Files that are under the malware scanning size limit from Reversing Labs
Files not found in a local copy of the NSRL
Files not found in a local cache of previous lookups. These results can be flushed at any time and no guarantee is made about how long results will reside.
3.4.2.4. Seeing Progress
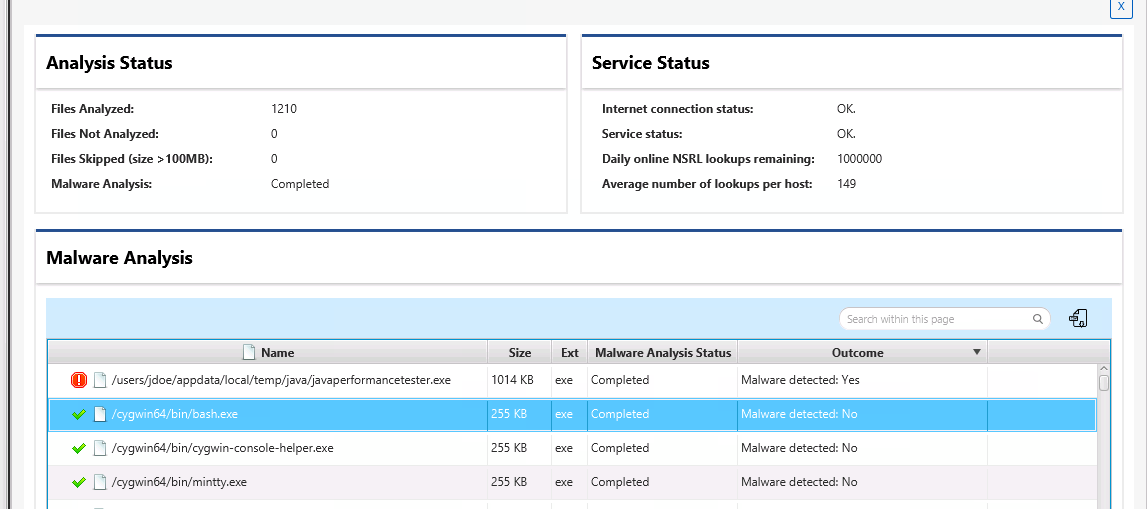
You can see what file were analyzed or not by going to the “Summary” view for the host, choosing “Analysis Jobs”, and then selecting the status next to “Malware Analysis” on the right.
3.4.2.5. Types of Limits
Each license has a limit with respect to how many lookups and uploads can be done in a certain amount of time. The system has several dimensions to make it fair for all customers and to ensure you can finish examinations.
First, there are categories of analysis types, each with their own limits.
Each Hash lookup will count towards your hash lookup category
Each File upload and ImpHash Query will count towards the upload category.
Within each category, there are three types of limits to ensure you can analyze as many hosts as possible:
Licensed Base - Each Cyber Triage license comes with a maximum number of hash lookups and file uploads that reset weekly. These are hard limits. For example, Standard Pro comes with 20,000 hash lookups per week.
Licensed Flex - These allow you to go a bit over your licensed base limits to finish processing a host. Each license comes with 1,000 flex lookups to use over the course of a calendar month. You cannot analyze a host using only flex. You need to have at least one base or boost lookup to start and then flex will be used.
Boost - You can purchase additional lookups and file uploads when you have big incidents and need to temporarily go beyond your usual limits. See the next section for details on adding and purchasing Boost codes.
When a host is added, Cyber Triage uses the limits in the following order:
First, it uses any Licensed Base remaining in the current weekly period.
Next, it uses any Boost codes that have been added. If there are multiple codes, it will first use the one that expires soonest.
Lastly, it will use Licensed Flex.
At any point, you can see your options panel (Options / Automated Analysis / Malware) and choosing “View Status”.
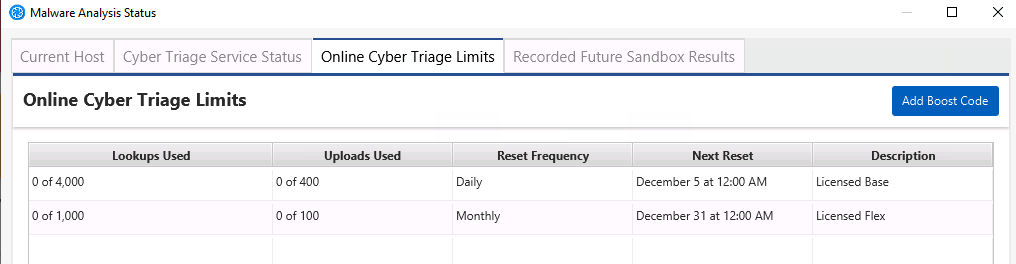
This panel will also show you how many lookups on average you use. This can help you determine when you will run out, but of course every host is different and some require more lookups than others.
3.4.2.6. Adding a Boost Code
Boost codes are valid for 30-days after they are added to Cyber Triage.
They can be used on only a single examiner system.
When added to a Team deployment, all clients will use the Boost code (analysis is done on the server)
You can purchase a Boost code via credit card at CyberTriage.com.
Once you have the code, you can enter it in several places. Cyber Triage will prompt you before and after adding a host to let you know that you are low. If you did not get a prompt, you can either get to:
Open the Options panel and navigate to “Automated Analysis” / “Malware”.
Choose “View Status” .
Then choose “Online Cyber Triage Limits” and press “Add Boost”.
You’ll enter a key that looks like either:
b826a555-951f-42ca-86ce-439a81106688
CT-8ed86eb5-17fc-4b3a-9b75-ce638c11b070
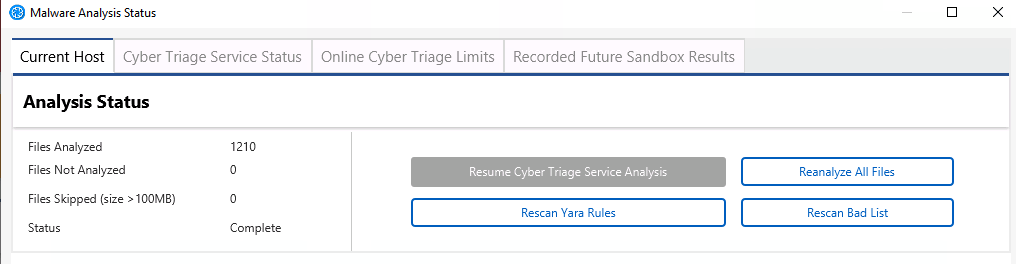
3.4.2.7. Resuming Malware Scanning
If you run out of malware lookups while analyzing a host, you have two options:
Wait until your time period resets (usually weekly). You can determine this date from the Malware Details panel.
Add the Boost code as outlined above now.
Once you have lookups available, you can open the host and navigate to the “Analysis Jobs” section of the “Summary” view. From there, choose the “Resume Malware Scan” button. The software should also prompt you when you re-open the host and it did not previously complete the analysis.
3.4.2.8. Seeing Malware Scan Results
You can see the details of the malware scanning when you select an item that has a file, go to the “File” tab below and choose Malware.
You will see how many engines flagged it as malware. Some special notes:
We are not allowed to display which engines thought it was malware. This is part of the agreement with ReversingLabs.
We use feedback from ReversingLabs to know which engines are the most reliable. It is possible that you will see an item that has several engines that flagged the file, but it is not scored as bad. That is because they are not the highest quality engines.
You can always search VirusTotal for those files to see which of its engines flag the file.
3.4.3. Document Malware Analysis
Office and PDF files are common vectors for phishing attempts to gain initial access to systems. Cyber Triage has basic analysis methods for detecting suspicious documents. These files are not uploaded to ReversingLabs, like executables can be, because they may contain sensitive information.
Cyber Triage will review Office and PDF files and mark them suspicious if they have:
Automatic actions that require no user interaction (such as those that occur when a document or page is opened)
Scripts (JavaScript, Macros, etc.) with certain actions.
Please contact us for a more specific list.
3.4.4. Yara Signatures
Cyber Triage can use Yara rules identify files that have patterns that have been associated with malicious activity. This allows you to import threat intelligence rules that you created or that others shared.
3.4.4.1. Configure Yara Signatures
Cyber Triage has a folder where you can place Yara rules. You can find that folder by going to the Options panel and choosing “Automated Analysis” / “Yara”.
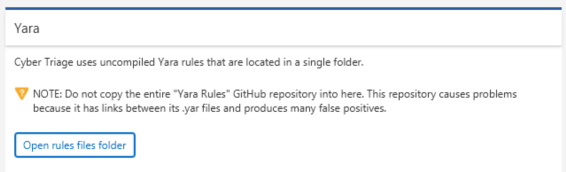
Options Panel
The default path is %localappdata%\cybertriage\config\yara_rules. However, this location is can be changed by changing the data folder location in the Cyber Triage® options panel.
Cyber Triage® will not search sub directories for Yara files. If you would like to organize your Yara rules with sub directories, then you’ll need to have a Yara file in the root directory that uses an include statements to refer to the other files.
Note
You will not be able to import the entire Yara Rules GitHub repository. This repository has links between its .yar files and causes many false positives. You should copy in only the rules that you are searching for.
Note
You cannot use rules that use external variables. There is no way to currently pass that value into the rule. These are used in some rule sets, such as those from Thor (https://github.com/Neo23x0/signature-base).
Note
If you are looking for a smaller, curated set of Yara rules, consider Yara-Forge.
Cyber Triage® uses libyara 3.8.1. Documentation can be found at: https://yara.readthedocs.io/en/v3.8.1/
3.4.4.1.1. File Location in Team Deployment
When running in a Team environment, nearly all of the analysis happens on the server. The exception is memory images. Volatility is run within the client. So, if you are in a Team environment and adding memory images, you need to have the Yara rules in your local AppData folder.
3.4.4.2. What is Analyzed
Collected file content will be analyzed using the configured Yara rules in the analysis pipelines. Cyber Triage will score files as Bad if they match a Yara signature.
Each time a session is ingested or a Yara rescan is initiated Cyber Triage® will take all .yar files in the above folder and compile them into a single compiled Yara file.
If a file matches a Yara signature and has not already been marked as malware, then it will get a Bad score and the rule name will be specified.
For memory images, the same Yara rules will be used by the yarascan Volatility module. Documentation to the yarascan Volatility module can be found here: https://github.com/volatilityfoundation/volatility/wiki/Command-Reference-Mal#yarascan
3.4.5. Bad and Good Lists
Cyber Triage can use lists of indicators to identify a file as good or bad. You can import lists from threat intelligence feeds and manually add items during your analysis.
3.4.5.1. Configure Bad and Good Lists
The Options Panel has tabs for both Good and Bad Lists. From there, you can add and remove entries.
3.4.5.1.1. Manually Adding a List Entry From Options
From within the appropriate Good or Bad List panel, you can choose Add Entry to manually enter the relevant details. You will have the option of adding the item at a global level so that it applies to all future hosts or at the Incident level so that it is applied only to future hosts in the same Incident.
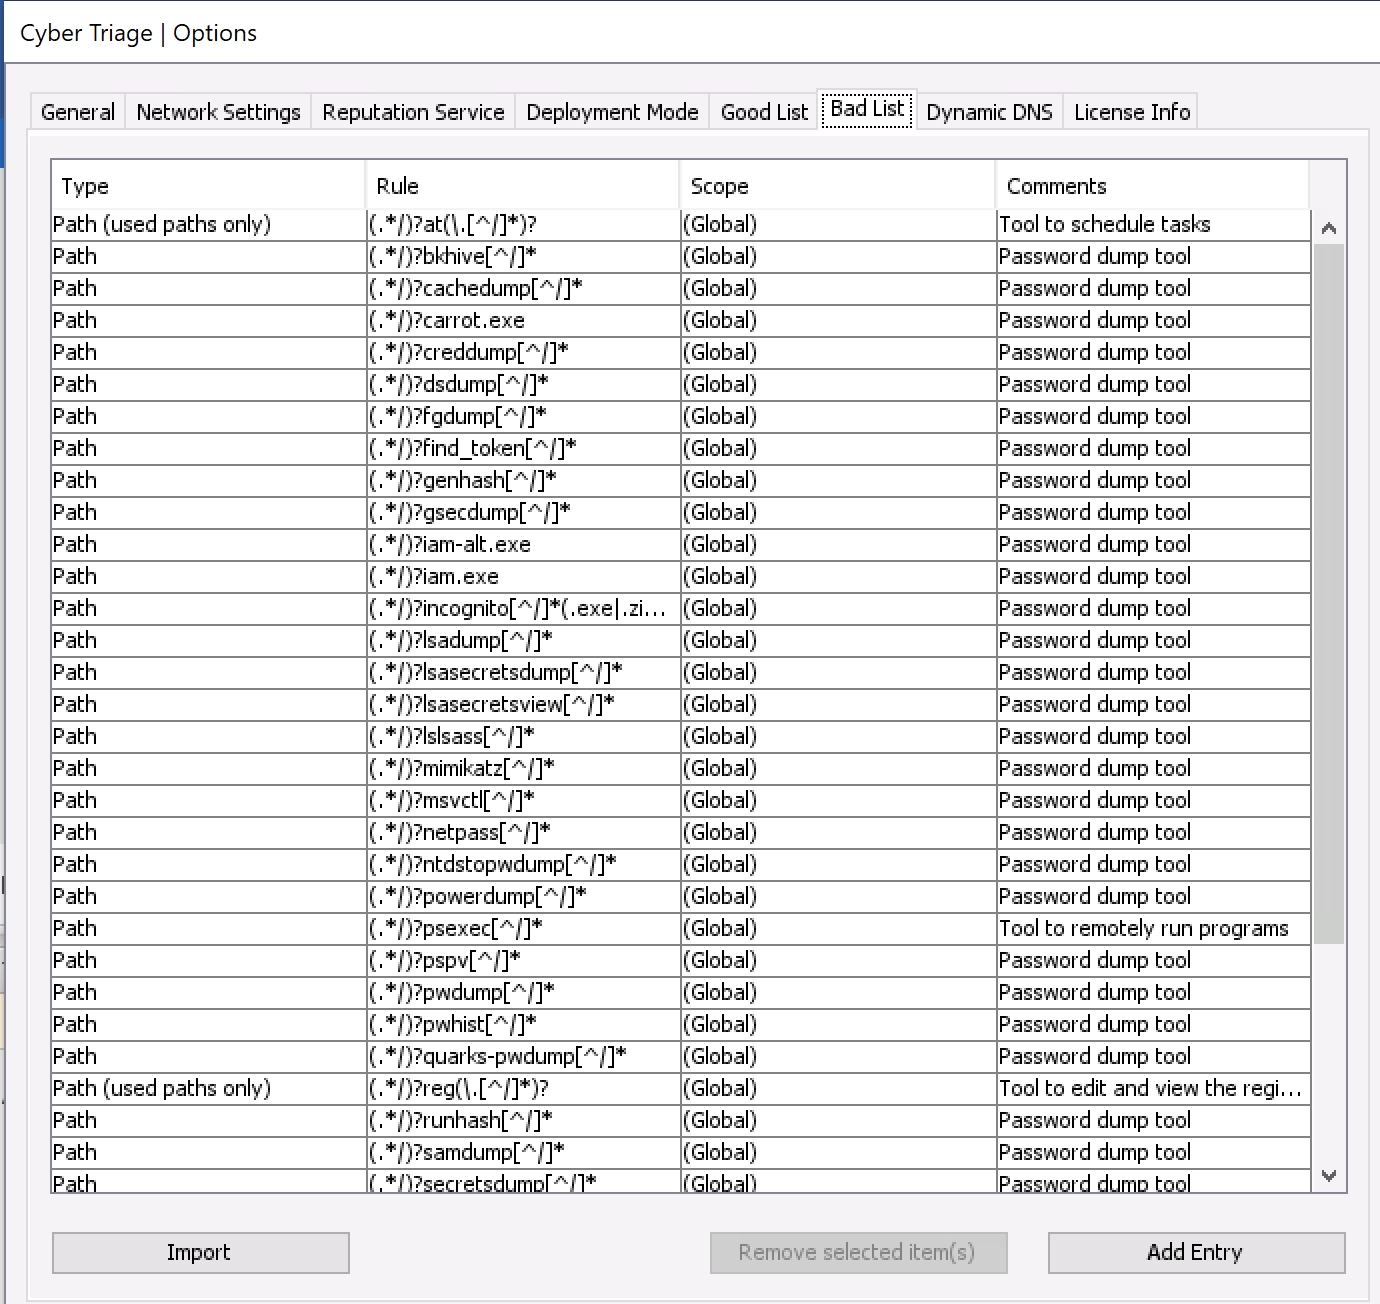
Options (Bad List Tab)
3.4.5.1.2. Importing Bad and Good Lists
You can bulk add Bad List items by pressing the Import button. Supported formats include:
Bad / Good List CSV format
Openphish (for Bad List items)
Cyber Triage Bad Items JSON (that was generated as a report from another Cyber Triage host).
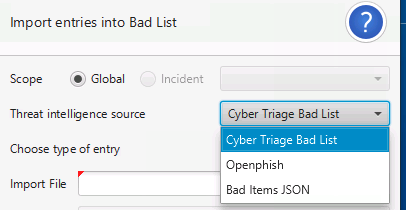
Import Bad List
Use the Generate Sample File button to generate a sample CSV file to determine what columns need to exist.
3.4.5.1.3. Removing Bad and Good List Entries
One or more Good or Bad List entries can be removed from their respective tables by highlighting the entry and selecting Remove selected item(s).
3.4.5.1.4. Editing Lists From The Main UI
When analyzing host data, such as viewing all triggered tasks, you can add or remove the items from Good or Bad Lists. These options are available from right clicking.
To add an item to the Good List, right click on it and choose Add To Good List. You can then choose to add it to a global- or incident-level Good List or only for that session.
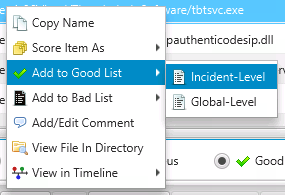
Add Item to Good List
Similarly, you can remove Good List entries by right clicking and choosing Remove from Good List.
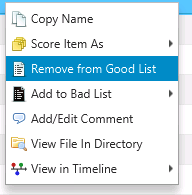
Remove Item from Good List
3.4.6. Previous Incidents
Cyber Triage tracks what items you manually scored as Bad and will ensure that they are marked as Bad in future hosts.
The propagation is done via an exact match algorithm, which often relies on file hashes. For example, if a file with the same name as a previously Bad item is seen again, then it will not get scored if the hash values are different.
If you are seeing false positives from this feature (because an item is no longer considered Bad), you can suppress future items from getting the Bad score by scoring it as Good in the current incident. Cyber Triage will then prompt you to see if you want to stop automatically scoring it in the future.
You can see the list of suppressed items in the Options panel under “Automated Analysis” / “Past Scores”.
3.4.7. Dynamic DNS
Cyber Triage® will mark hostnames as suspicious if they are part of a dynamic DNS setup, which can be used by malware to avoid network-based detection. If a hostname uses dynamic DNS, then it will be marked as Suspicious.
Cyber Triage® ships with a set of Dynamic DNS providers that it will detect. You can add more providers by going to Options, Dynamic DNS. The domains hosted by dynamic DNS providers are detected using the DNS server for the domain. To add a provider, you add the DNS server names.
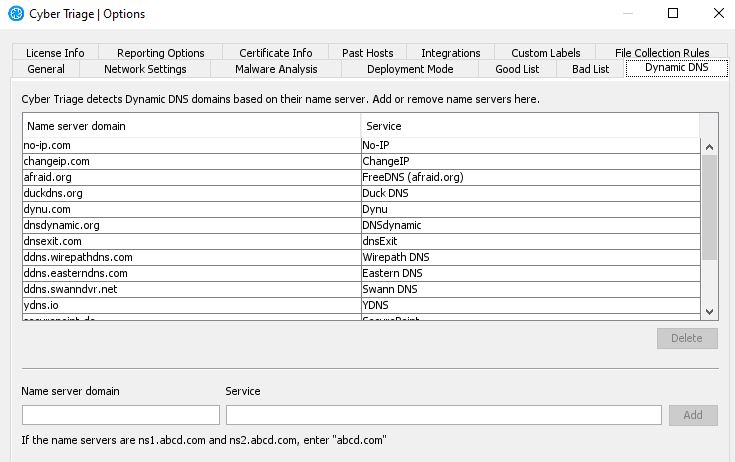
Dynamic DNS providers
3.4.8. Ransomware
Cyber Triage® has several ransomware-specific detection techniques. Ransomware incidents are much like any other incident where attackers laterally move through an environment, but the difference is on their final action (where they encrypt the data instead of just stealing it).
The ransomware-specific techniques include:
Detection of ransomware notes based on known naming patterns
Detection of possible ransomware notes based on heuristics
Detection of data recovery techniques disabling, such as Volume Shadow and Microsoft Backup
Cyber Triage® focuses on making sure you quickly determine when the encryption started so that you can work backwards to determine how ransomware was deployed.
Cyber Triage® does not have decryption features.