3.3. Adding a Host
To add data from a host, press Add New Host from the Incident Dashboard. You’ll be prompted to choose a method.
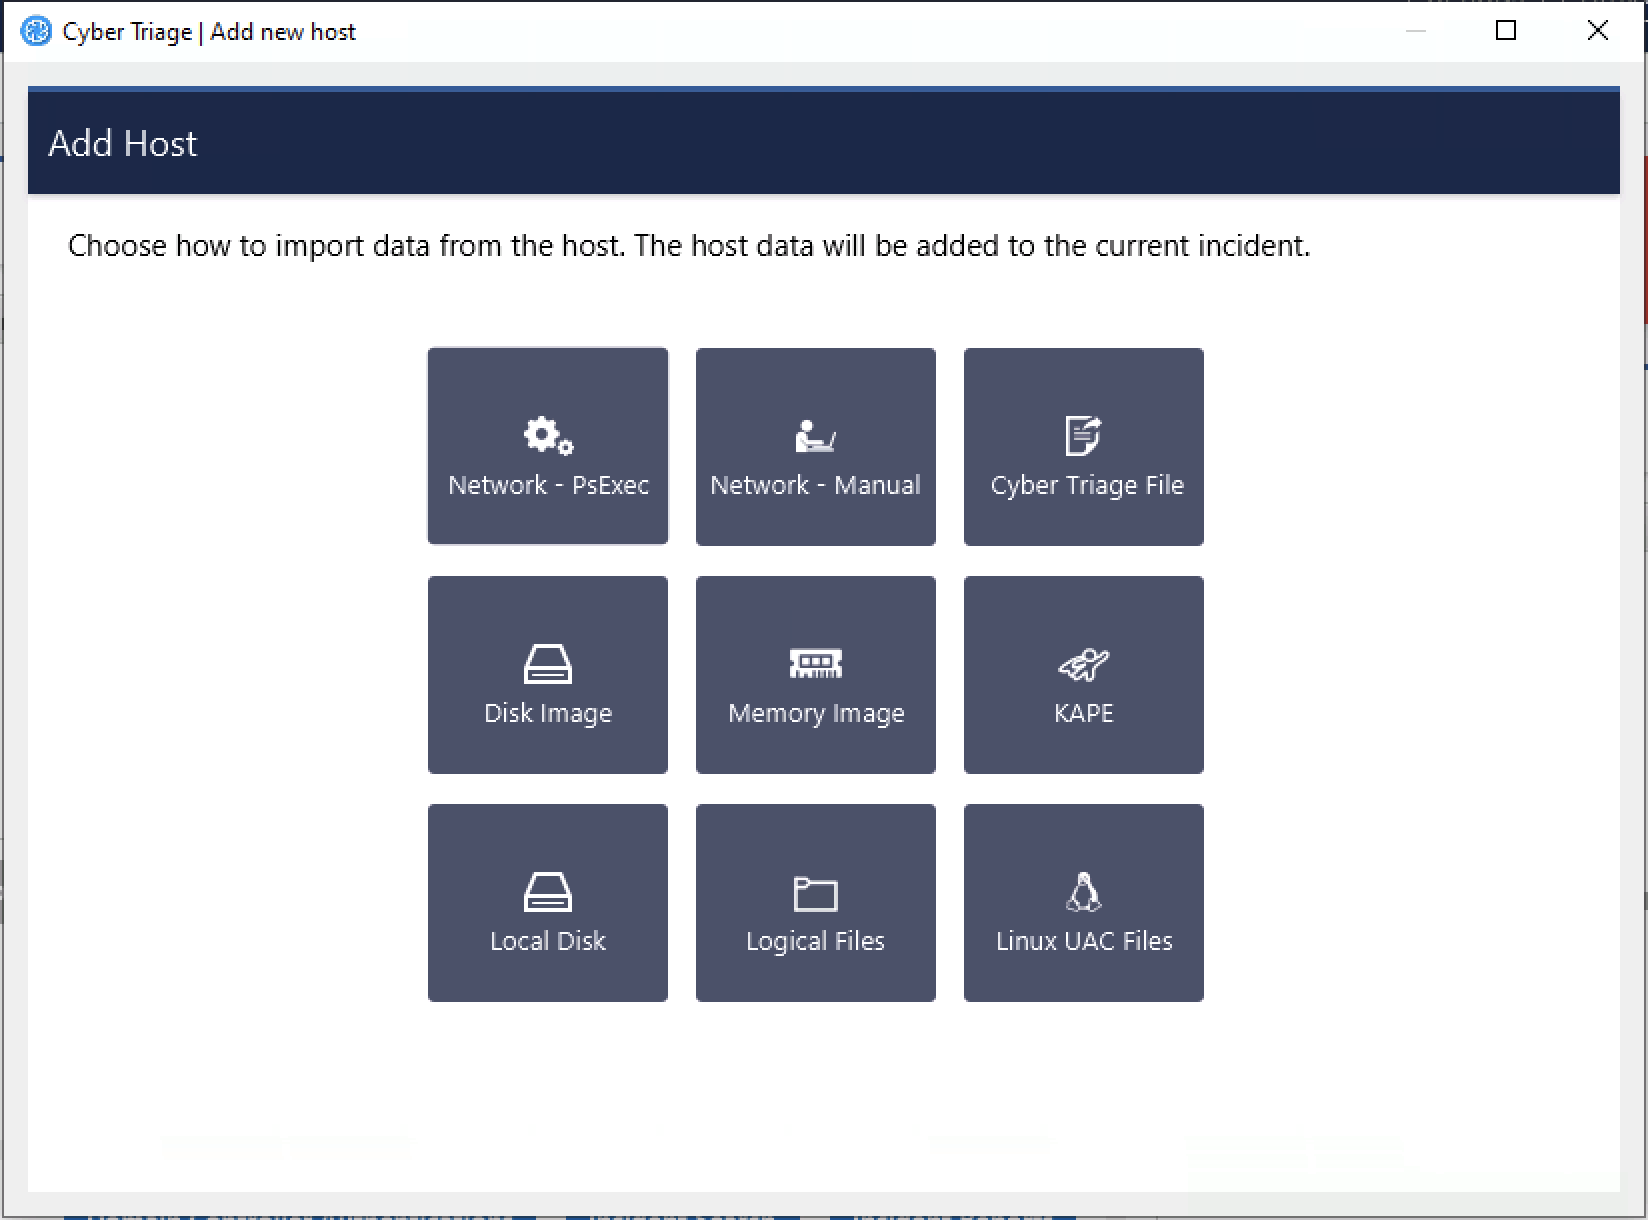
Add New Host Panel
As mentioned in the previous chapter, Cyber Triage supports a variety of ways of getting host data into it. Some scenarios will involve using the Cyber Triage Collector tool to extract artifacts from a live system. Others involve importing an already collected data set, such as an E01 image.
The basic process is:
Ensure the threat intelligence is up to date (Update Threat Intelligence)
Choose the method to add (Getting Data Into Cyber Triage)
Configure the automated analysis settings, such as malware scanning (Ingest-Time Settings)
The details are in the following pages:
- 3.3.1. Basic Concepts
- 3.3.2. Update Threat Intelligence
- 3.3.3. Add Over The Network - PsExec Launch
- 3.3.4. Add a Cyber Triage Collector File
- 3.3.5. Add Over The Network - Manual Launch
- 3.3.6. Add a Disk Image
- 3.3.7. Add a Memory Image
- 3.3.8. Add KAPE and Velociraptor Output
- 3.3.9. Add Logical Files and Folders
- 3.3.10. Add a Local Windows Disk
- 3.3.11. Add Linux UAC Output
- 3.3.12. Add EDR Telemetry Data