3.1. Incident Management
The first step to investigating the remote host is to collect data from it. This section outlines how to collect data and add it to Cyber Triage® for analysis.
3.1.1. Incidents and Hosts
Cyber Triage® uses the following data management terminology:
An Incident represents an investigation and can contain data from one or more hosts.
A Host represents a computer that is being investigated. There are a variety of ways to get data from hosts into the application.
The basic workflow for adding a host is:
Create a new incident or open an existing one.
Choose the method to get data into Cyber Triage®. Details are given below.
Some methods will require you to choose the kinds of data you want to extract.
Choose your malware scanner settings.
3.1.2. Creating an Incident
Every host needs to be part of an incident. An incident will have its own good and bad lists and its own database. You can create an incident from the opening Cyber Triage® screen:
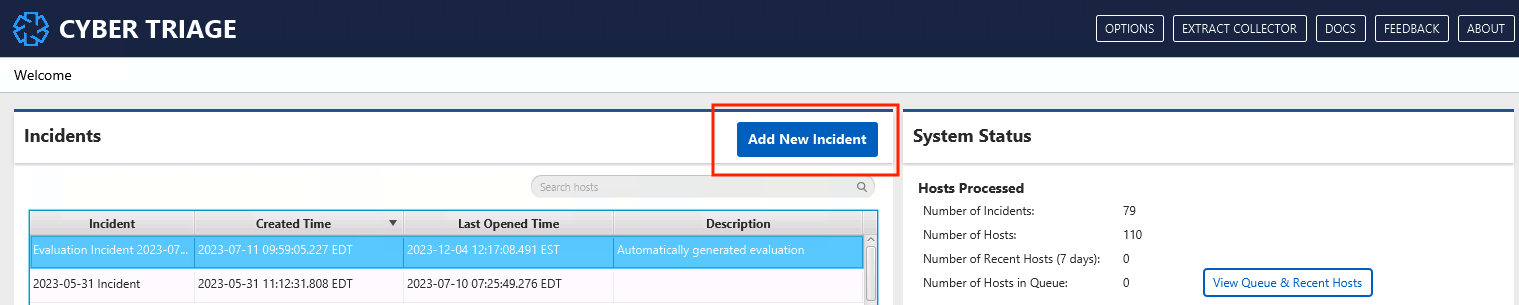
Opening Cyber Triage Panel
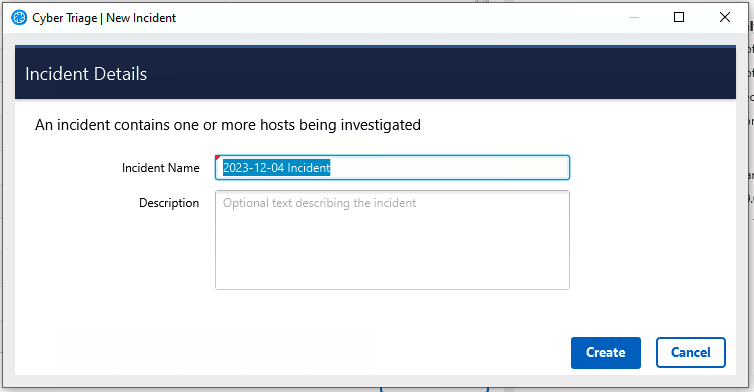
Press Add New Incident and add:
Incident Name: Must be unique and not have special characters
Description: Optional
- If you have an Enterprise-tier and the Incident Access Control feature enabled, you’ll have the option of limiting access.
The ‘restrict access’ option will cause only the user who creates the incident to have access. They can add additional users.
The ‘make incident visible’ option will cause the artifacts to go to the central database for correlation, baselining, and other features that rely on knowledge of past cases.
That will then bring you to the Incident Dashboard:
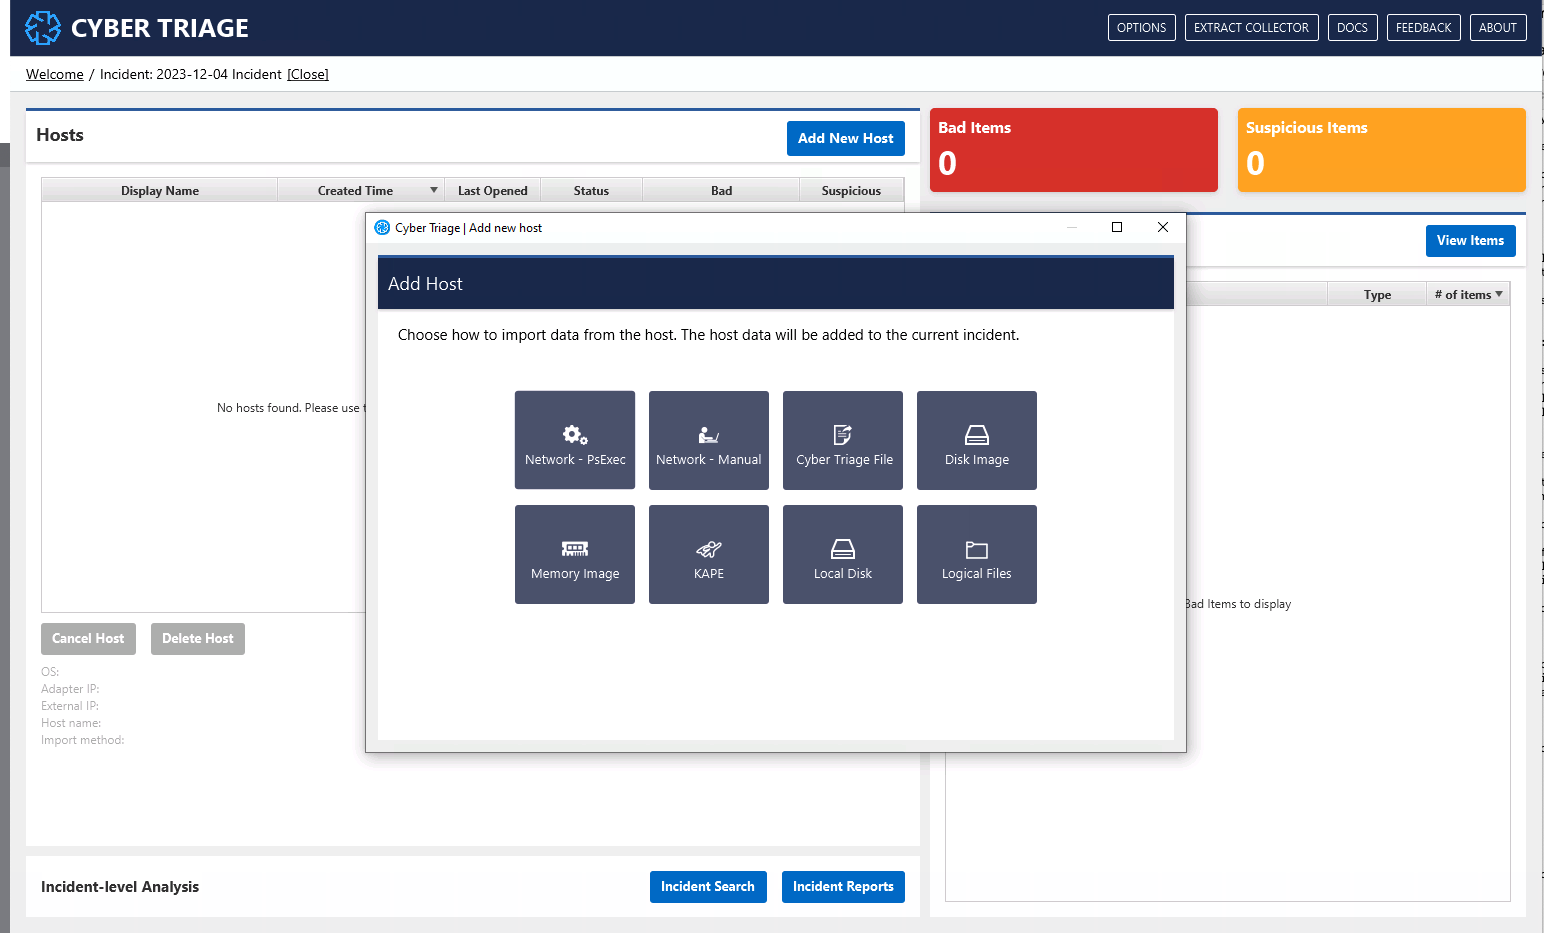
From here, you can add data from hosts and open existing hosts. We will cover this in Adding a Host.
3.1.3. Adding Users to an Incident
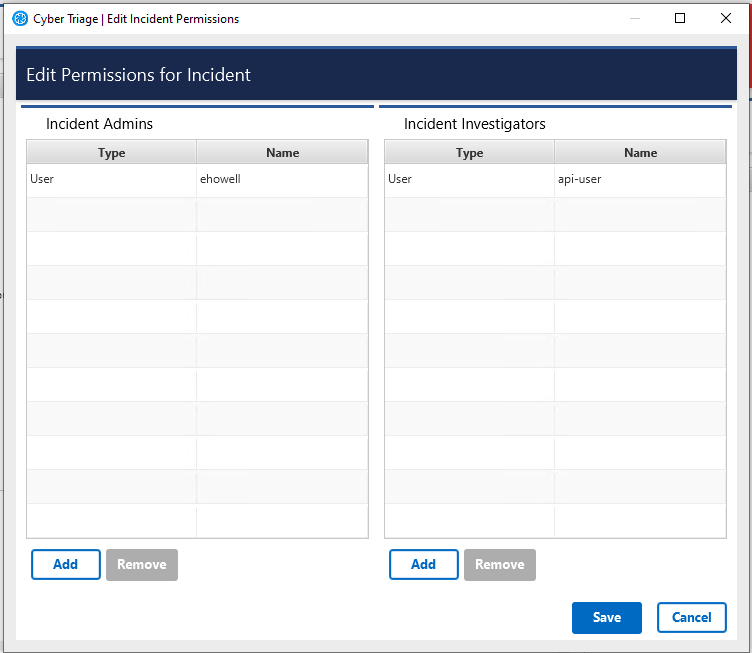
If you have an Enterprise-tier license and the incident was created with restricted access, then investigators will need to be added to it. You can do this from two places:
The Edit Incident Permissions button on the Incident Dashboard. This option is easiest after someone creates the incident and wants to add other investigators to it.
The IAM & Admin / Incident Permissions part of the HTML options panel. This option is easiest for super admins to add users to an incident because super admins cannot open an incident until they have been granted permission.
The panel allows you to choose which users to grant as Administrators (they can add additional people) or basic Investigators.
3.1.4. Incident Data Storage
Here are some basics of where incident-level data is stored:
Each incident will have its own database. Team databases are in PostgreSQL and Standard databases are in the Data Folder.
There is a correlation database that stores signatures, but not all metadata, of items to allow for correlation between incidents and hosts.
File content is stored separately in the “Data Folder” based on hash value, which avoids storing duplicate copies of the same file.
3.1.5. Deleting an Incident
You can delete an incident from the opening panel. Press the “Delete” button once you’ve selected the incident.
This action will:
Delete the incident database
Provide you the option to remove data from the central correlation database
You cannot delete an incident if it is open or currently being processed.