3.3.5. Add Over The Network - Manual Launch
Network - Manual (previously called ‘Live Manual’) is for cases when you cannot automatically push the Collector to the remote system. In this approach, you run the Collector from the remote system and it sends the results over the network to Cyber Triage®.
The Collector will need to be able to communicate with the Cyber Triage® system over TCP port 443.
If you haven’t already done so, extract the Collector to a USB drive using the steps outlined in Extracting the Collector.
To perform the collection, you will need to interact with both Cyber Triage® and the remote system.
Watch the Cyber Triage Basics Course Manual video on this technique.
3.3.5.1. Prepare Cyber Triage For the Data
In Cyber Triage®:
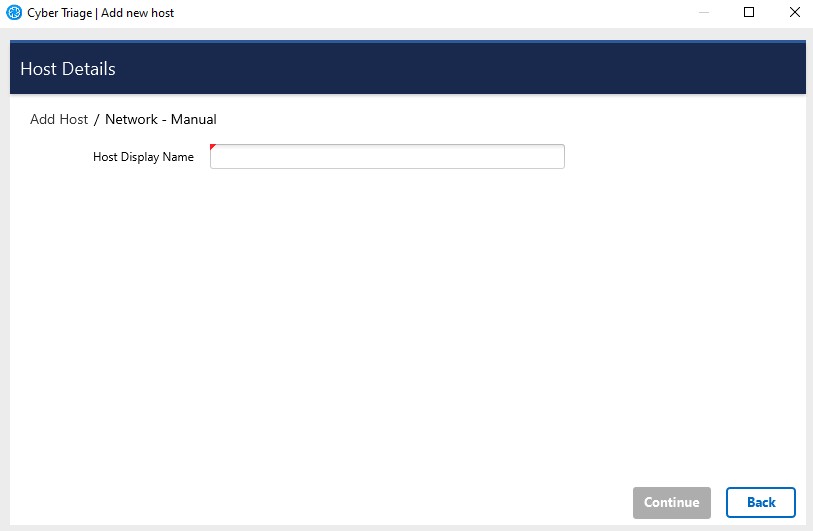
Choose the Network - Manual box from the Add New Host area.
You will be prompted to enter information about the host being collected from. The display name can be a host name or more descriptive.
Network - Manual
If this is the first time that you are running Cyber Triage®, you maybe prompted by Windows Firewall or another security application to allow Cyber Triage® to accept connections. You will need to do this to allow data to be imported into Cyber Triage®.
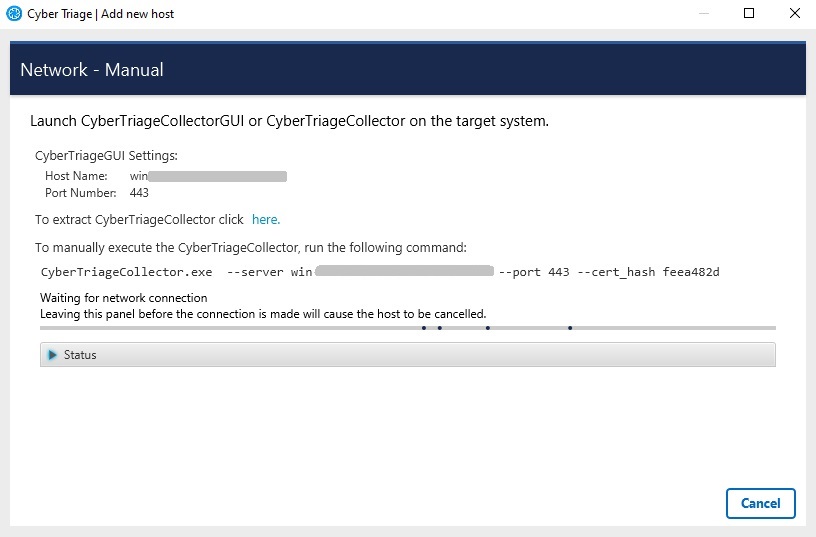
Cyber Triage® will tell you what settings to use on the remote system.
Network - Manual
You will then be prompted to configure malware scanning settings, see Ingest-Time Settings.
At this point, Cyber Triage is waiting for an incoming connection from the Collector.
3.3.5.2. Start Collection on Remote Host
Next, perform the following on the remote system.
Insert the USB device with the Collector, or ensure that the Collector is available via a network share.
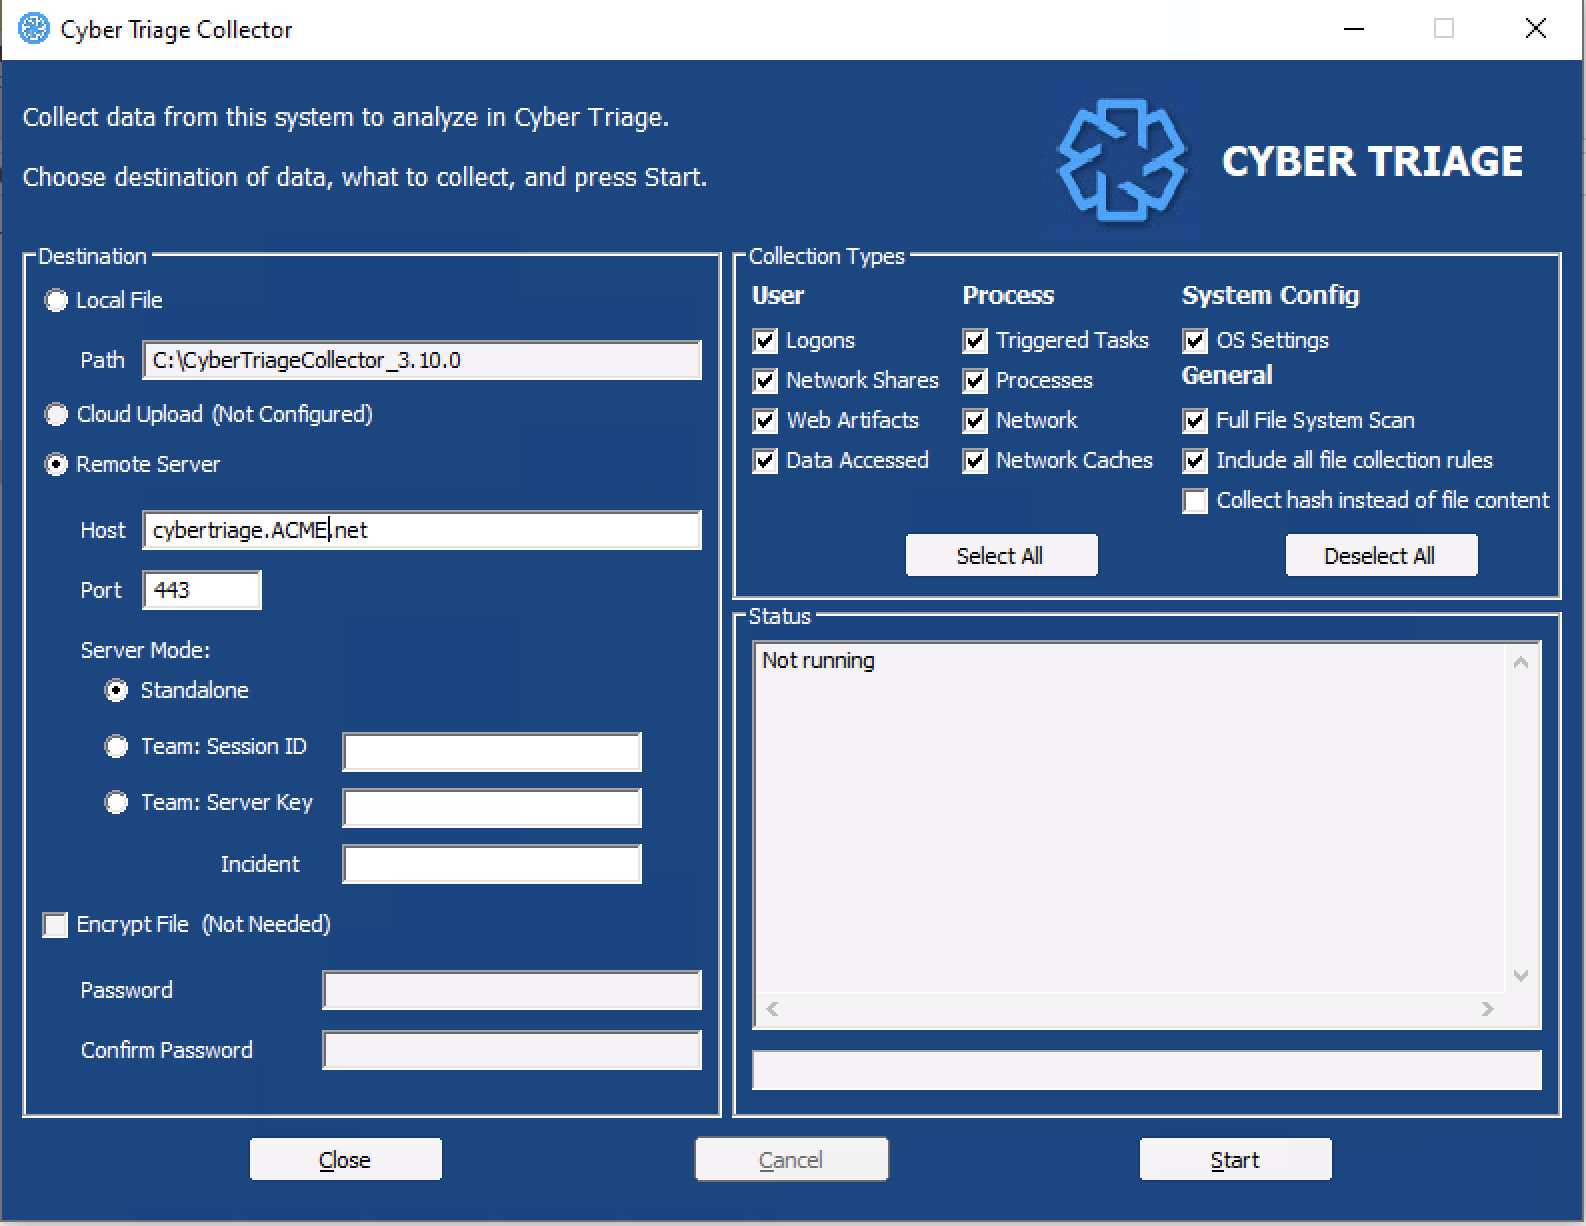
- Launch the Collector either:
- From the command line and specify ‘–server’ and other arguments
CyberTriageCollector.exe --server host1 --cert_hash e21be6eb --sessionid 1234567890
From the GUI Wrapper and specify the server name as the target.
After collection has started, proceed to Host-level Examination for an overview of the analysis techniques.