16.2. Collect with SentinelOne Singularity
You can deploy the Cyber Triage Collector tool via SentinelOne Singularity if you have RemoteOps or RemoteShell capabilities. This allows you to collect the artifacts over the network without needing to use PsExec.
The approach is different for RemoteOps vs Remote Shell, so there are different sections below. Note that some Singularity deployments do not have either of these features.
16.2.1. RemoteOps
RemoteOps is an add-on that allows you to run PowerShell scripts on multiple hosts and maintain a script library. The basic approach to deploying Cyber Triage is to customize our Deployer Powershell script and upload it to RemoteOps library. You can then push that uploaded script to whichever host you want to collect from.
16.2.1.1. Prepare RemoteOps for Collection
There are three main steps to making sure RemoteOps is ready to deploy the collector.
Download the Deployer Powershell script from the website.
- Configure the script as outlined in the Collector Deployer Powershell Script section. You’ll need to make decisions about where data will be sent, etc. Some special notes about RemoteOps capabilities:
RemoteOps can copy over the Collector EXE in a ZIP file along with the script.
Upload the script to the RemoteOps library as outlined below.
16.2.1.1.1. Uploading the Powershell Script to RemoteOps Library
Before uploading the script, ensure you’ve edited it based on:
How the Collector will get onto the host
What data will be collected
Where data will be sent
As a reminder, you can run the Powershell script locally to make sure it works.
Uploading the deployer script is the same as any other Powershell script. Nothing in this process is unique to Cyber Triage, but we will outline the basic ideas here:
Press the “Upload New Script” button from the RemoteOps section
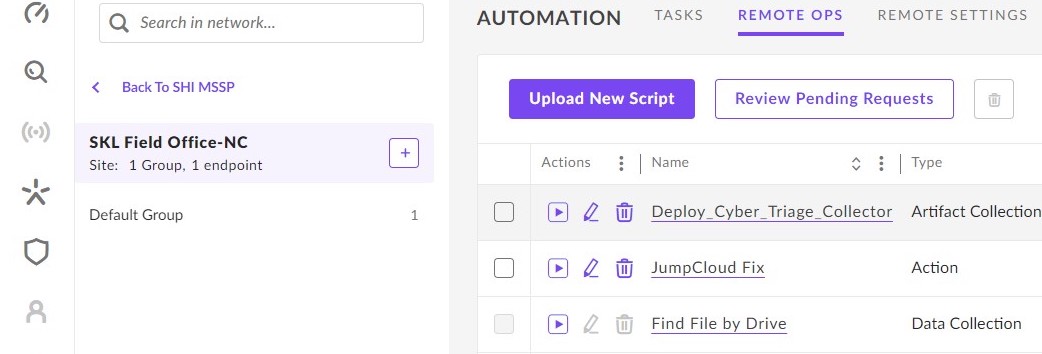
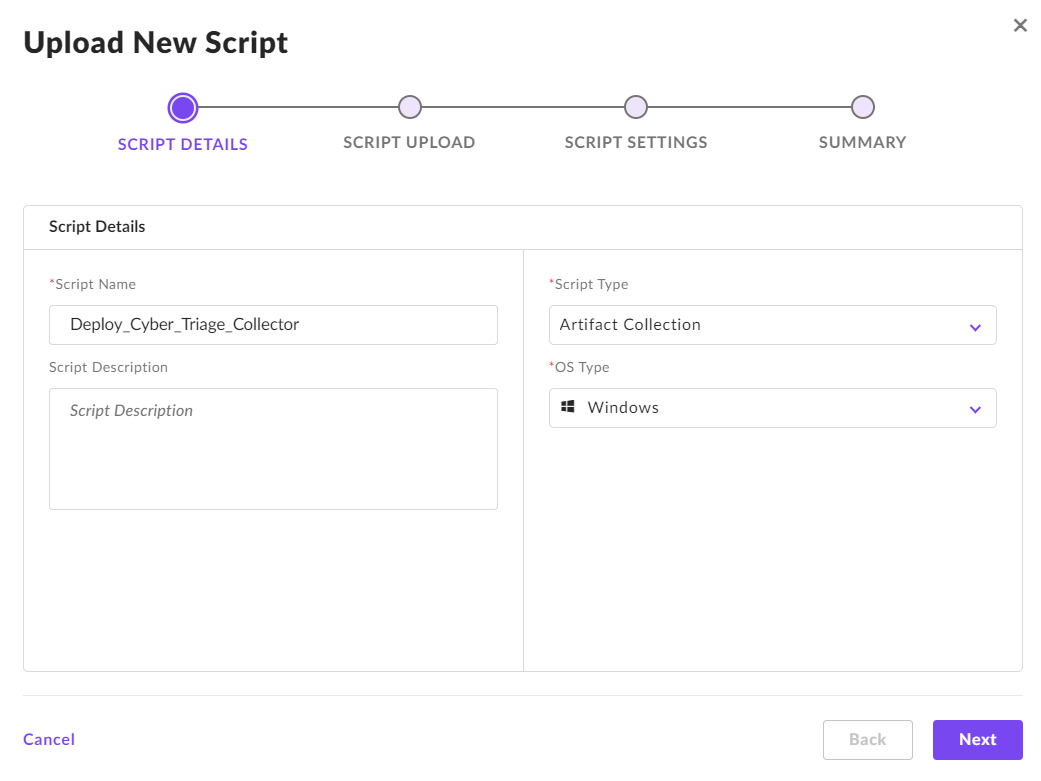
Give it a name, such as “Deploy Cyber Triage Collector”. You need to choose that it runs on Windows and can choose “Artifact Collection” for the Type.
Next, navigate to your edited script. You can keep the ZIP file option unchecked unless you changed the script so that it does not download the EXE from the website and you instead want to push the EXE. In that case, you need to create a ZIP with the EXE and config files and configure that too.
On the settings panel, your changes here depend on if you configured the script to require command line arguments (this is not common). If you did, then you should specify them with the “Input is Required” section. Update the timeout to be at least 10800 seconds (3 hours).
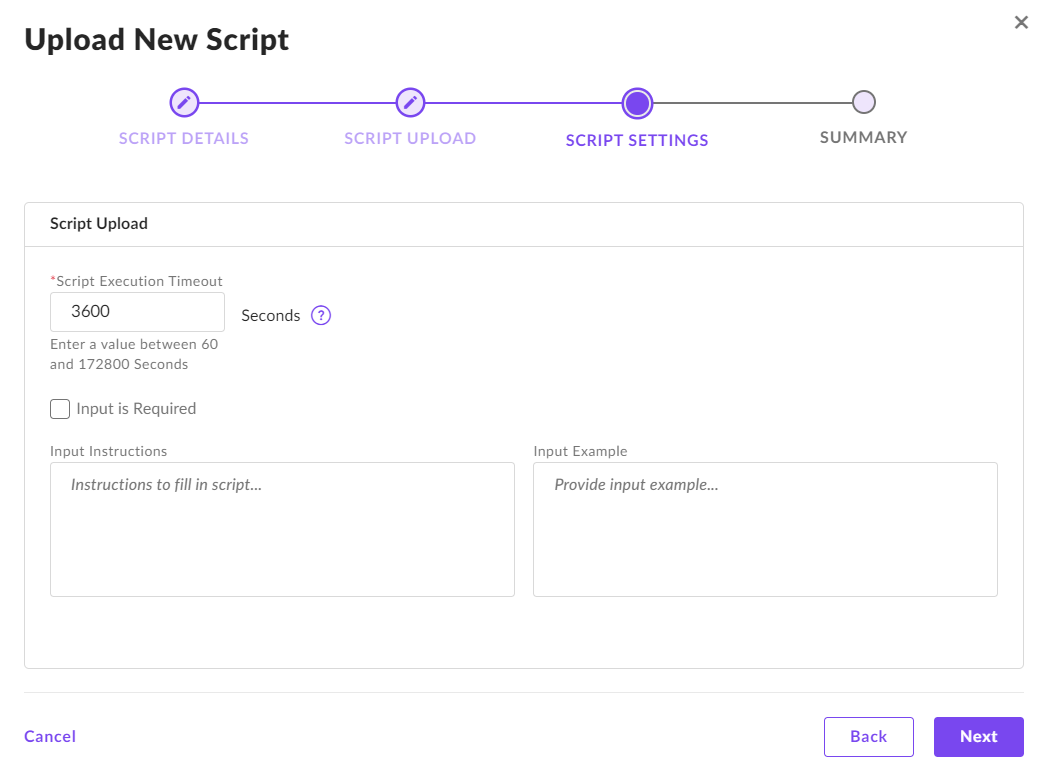
16.2.1.2. Initiate a RemoteOps Collection
Once the deployer script has been uploaded to the RemoteOps library, you can simply launch it on a given host and data will be sent to where ever you configured the script.
Note that you can also launch a script with RemoteOps to all hosts, but this is not recommended as part of an investigation. You should focus Cyber Triage on your initial list of suspect hosts and then increase scope from there.
Pick the endpoint in the Sentinels section.
Choose Actions -> Response -> Run Script
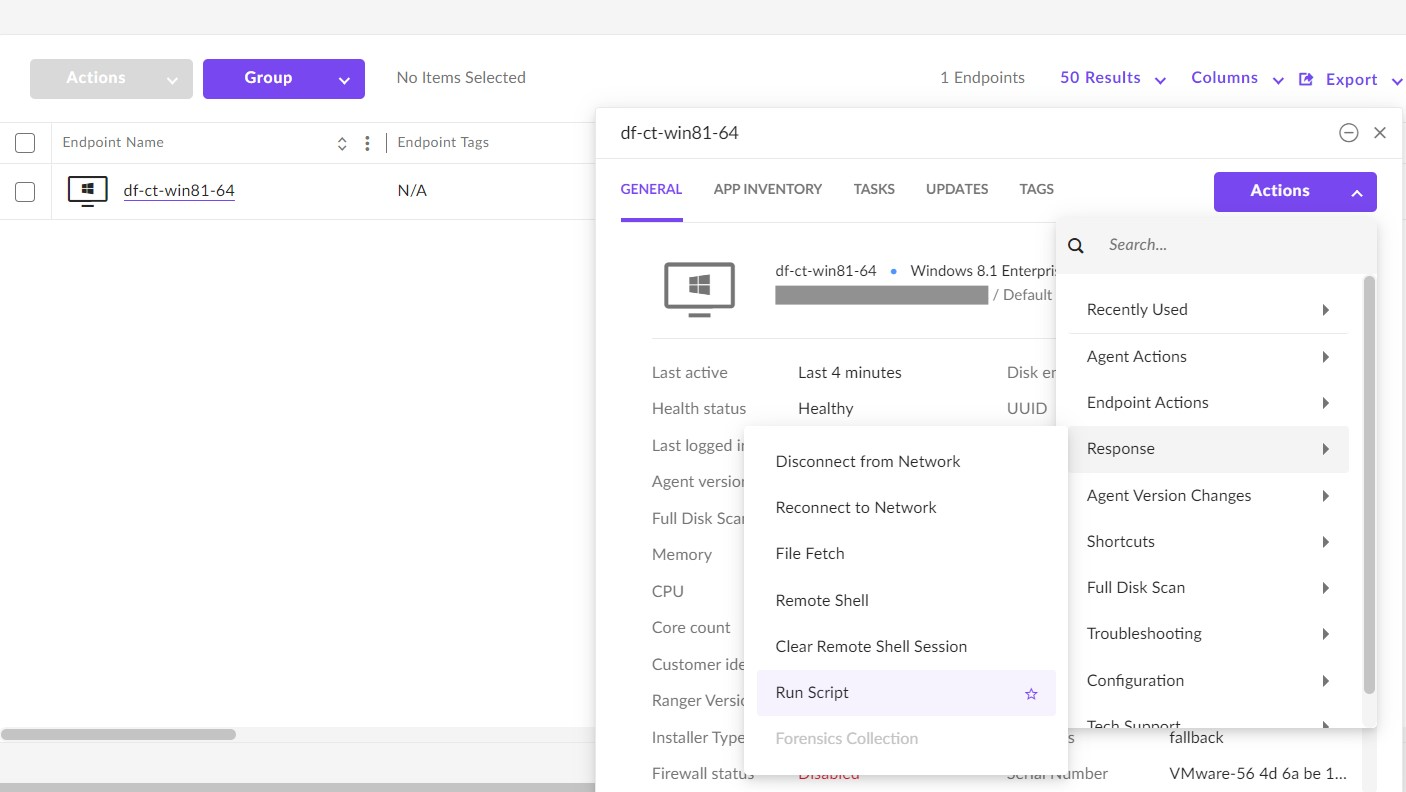
Choose the Cyber Triage Deployer Script
- When S1 asks about inputs and outputs:
If you configured the script to take inputs, then they should be entered here. But, generally no inputs are required because the script should have been configured.
If output is going to a server, S3, or you’ll copy the data, the output can be set to “None”
If you configured the script to write the results to a file (the default), then supply that as the “Specific Path”. The default location in the script goes to the temp folder.
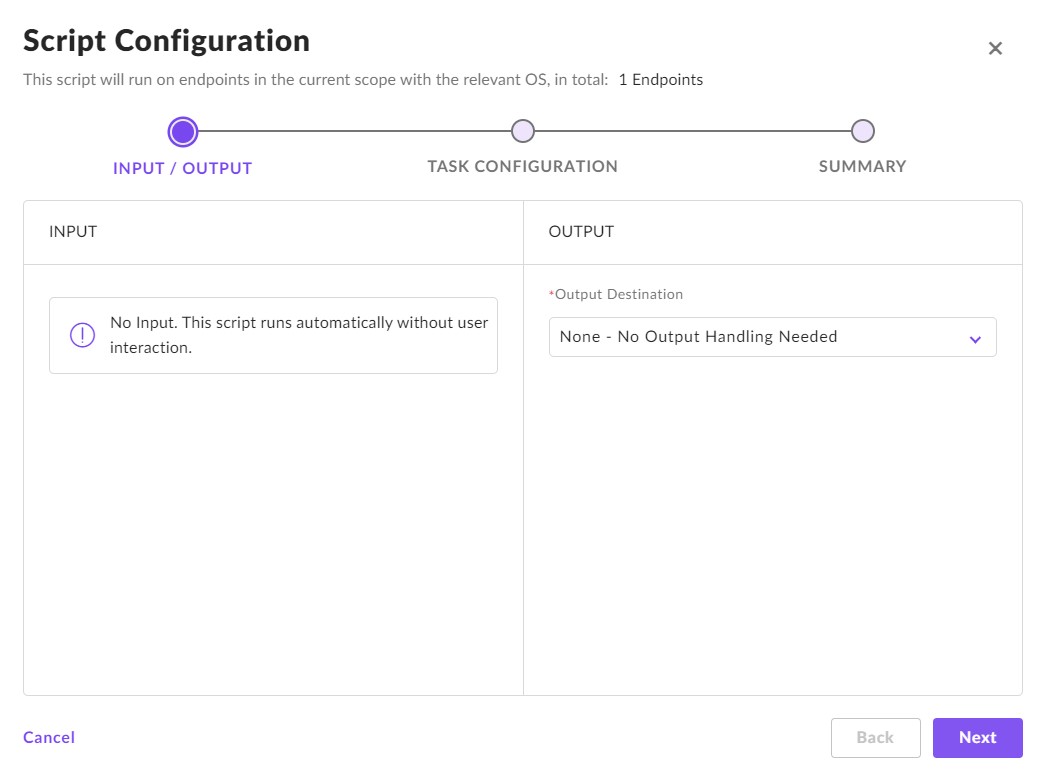
The default maximum time should still be 10,800 seconds from the setup. You can keep that.
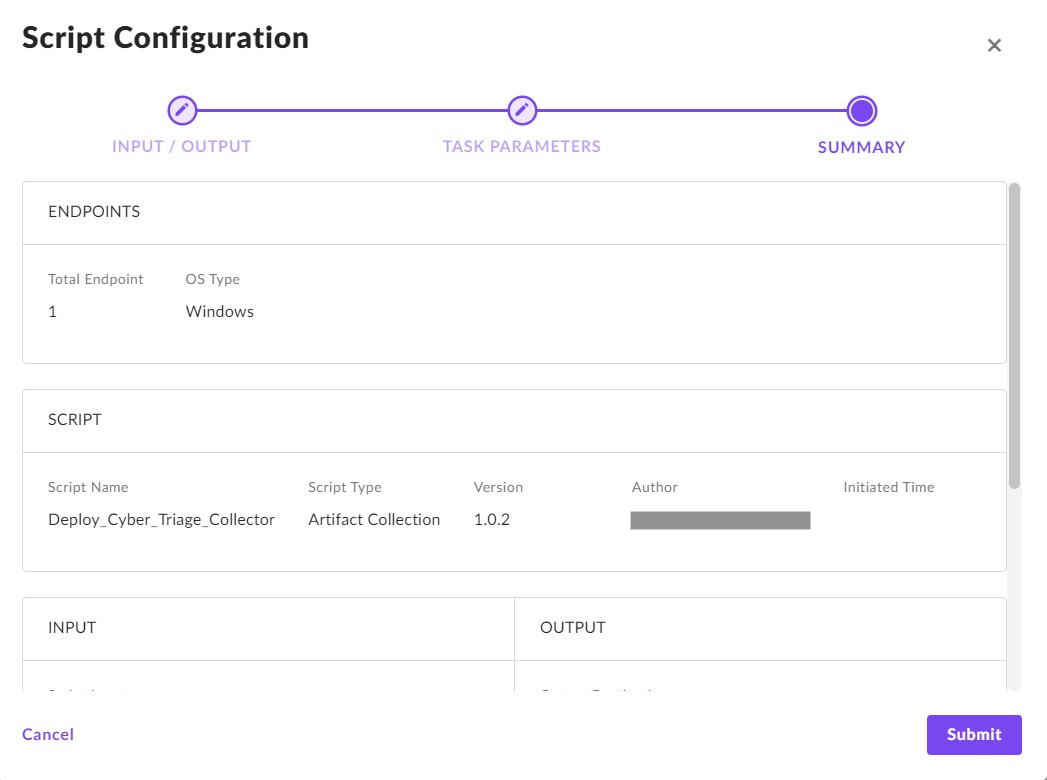
After you press Submit, you’ll see the progress under Automation / Tasks.
16.2.2. S1 Remote Shell
For the Sentinel One users without RemoteOps, you can deploy Cyber Triage if you have the Remote Shell feature, which gives you a shell on a given host. This section will outline how to use that feature to deploy the Cyber Triage Collector.
You’ll have two choices when using the remote shell:
Use the Deployer script and configure it so that it has all of the settings you need.
Manually move files and launch every command
16.2.2.1. Using the Deployer Script With Remote Shell
With S1 Remote Shell, it’s going to be your responsibility to get the deployer script over to the host before it is launched. Remote shell does not have a script library.
There are three main steps you should do before an incident.
Download the Deployer Powershell script from the website.
- Configure the script as outlined in the Collector Deployer Powershell Script section. You’ll need to make decisions about where data will be sent, etc. S1 Remote Shell has some limitations to be aware of:
It doesn’t offer a way to push the collector or config files to the endpoint. You’ll need to manually download them or have the script download them.
It doesn’t offer a way to get data from the host. You’ll need to have the data uploaded to S3, to a Cyber Triage Server, or use the PowerShell Copy-Item to copy the output to another location.
- Save the Deployer script “somewhere” so that it can be later downloaded or copied. Examples include:
At a URL, such as an S3 bucket or internal server
A file share that the S1 agent will have read access to
When you want to start a collection:
Navigate to the host in the “Sentinels” section and choose Actions -> Response -> Remote Shell
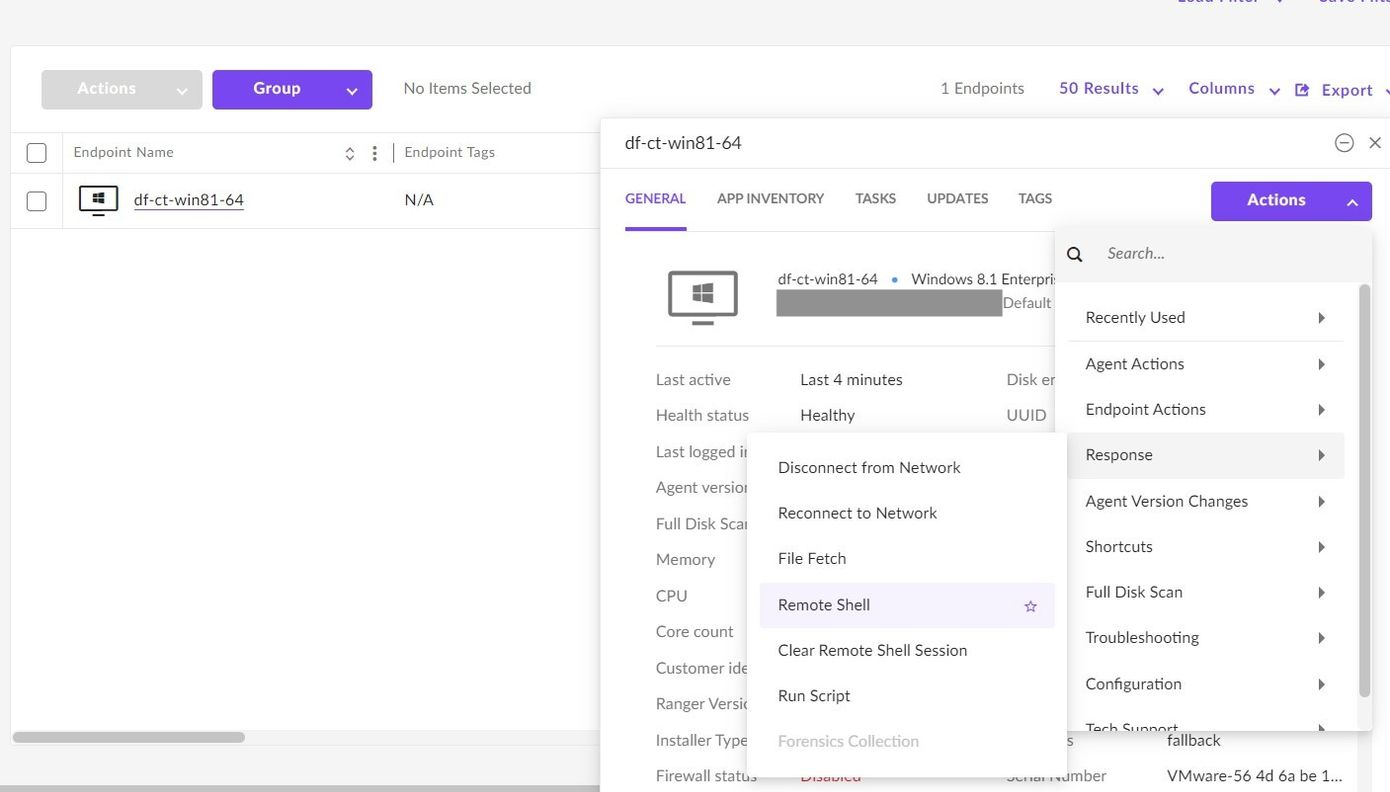
Enter the needed passwords and you’ll get a shell.
Download your edited script by typing in something like:
Invoke-Webrequest -URI http://yourserver/deploy_cyber_triage_collector.ps1
or
Copy-Item \\UNC\Path\deploy_cyber_triage_collector.ps1
Run the
.\deploy_cybertriage_collector.ps1script. For S1, the script should block until the collection is done.
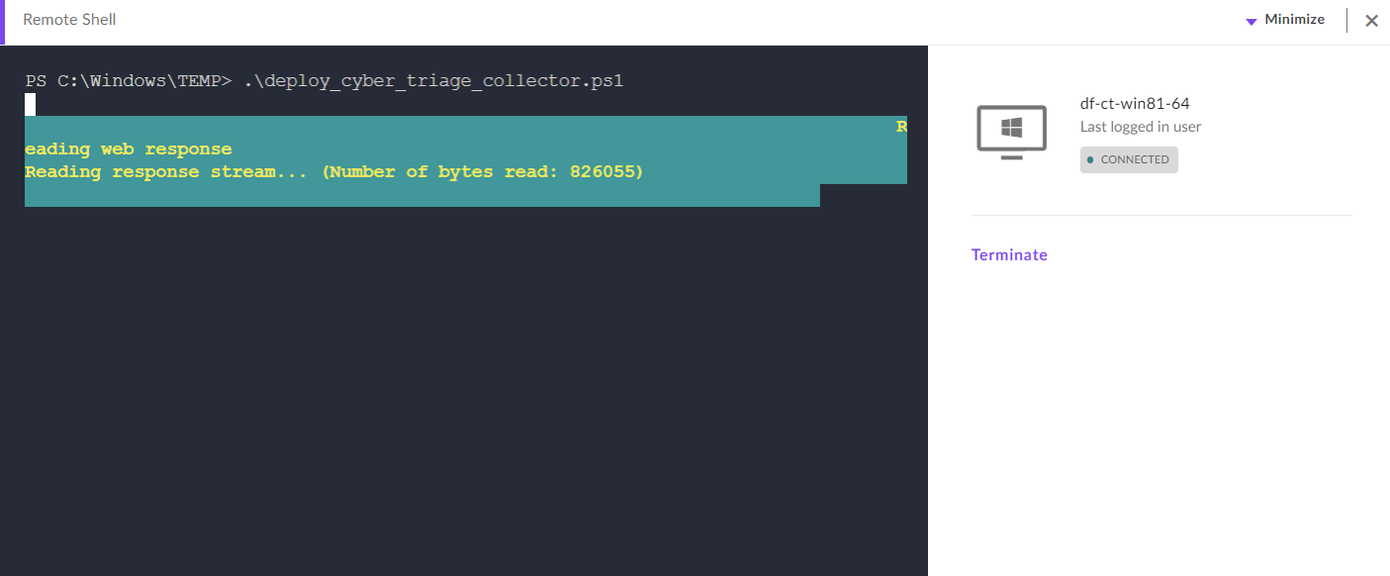
16.2.2.2. Manually Running Cyber Triage from Remote Shell
You can also not use any scripts and instead type in several commands yourself. You can refer to the Deployer script for details.
Refer to Collector Command Line Arguments for details on which command line arguments to give to the collector.