7.1.6. Windows Defender-based Collections
You can deploy the Cyber Triage Collector tool with Windows Defender for Endpoint using the Live Response feature. This allows you to collect the artifacts over the network without needing to use the PsExec-based approach that comes with Cyber Triage (see Add Over The Network - PsExec Launch).
Live Response is currently available with:
Microsoft Defender for Endpoint Plan 2
Microsoft Defender XDR
7.1.6.1. Defender Live Response Basics
The official Microsoft documentation should be referred to for details of Live Response, but let’s cover the basic concepts:
Live Response gives you access to a command prompt on a remote system
It works on a subset of Windows versions and must be enabled
The Defender server can store files that get pushed to the endpoint when a live response session is started.
The basic approach for deploying Cyber Triage Collector will be to:
Edit the Cyber Triage Deployer script to meet your use case
Upload the Deployer script (and other configuration files) to the library in your Defender account
Create live sessions as needed and manually run the Deployer
7.1.6.2. Deployer Script
We recommend that you use the Cyber Triage Deployer script to deploy Cyber Triage with Defender. It takes care of Defender-specific settings and can autodetect that it is running within Defender.
Here are some special notes about Defender:
It will kill a session if you do not type something into it after 30 minutes. Some Cyber Triage collections take longer than this, so the Deployer script will launch the Collector as a background process.
Defender stores files from its script library into a “Download” folder in C:\ProgramData. This is also where the script is run from. The Collector can not write there though, so it uses C:\Windows\Temp for output.
Defender will only copy files back that is 3GB or less. The Collector will make files smaller than that.
Refer to Configure the Collector Deployer Powershell Script for getting and configuring the script.
7.1.6.3. Starting a Live Response Session
Before you can configure the Defender script library, you need to start a Live Response session. So, we’ll cover that first.
Log into your Defender account.
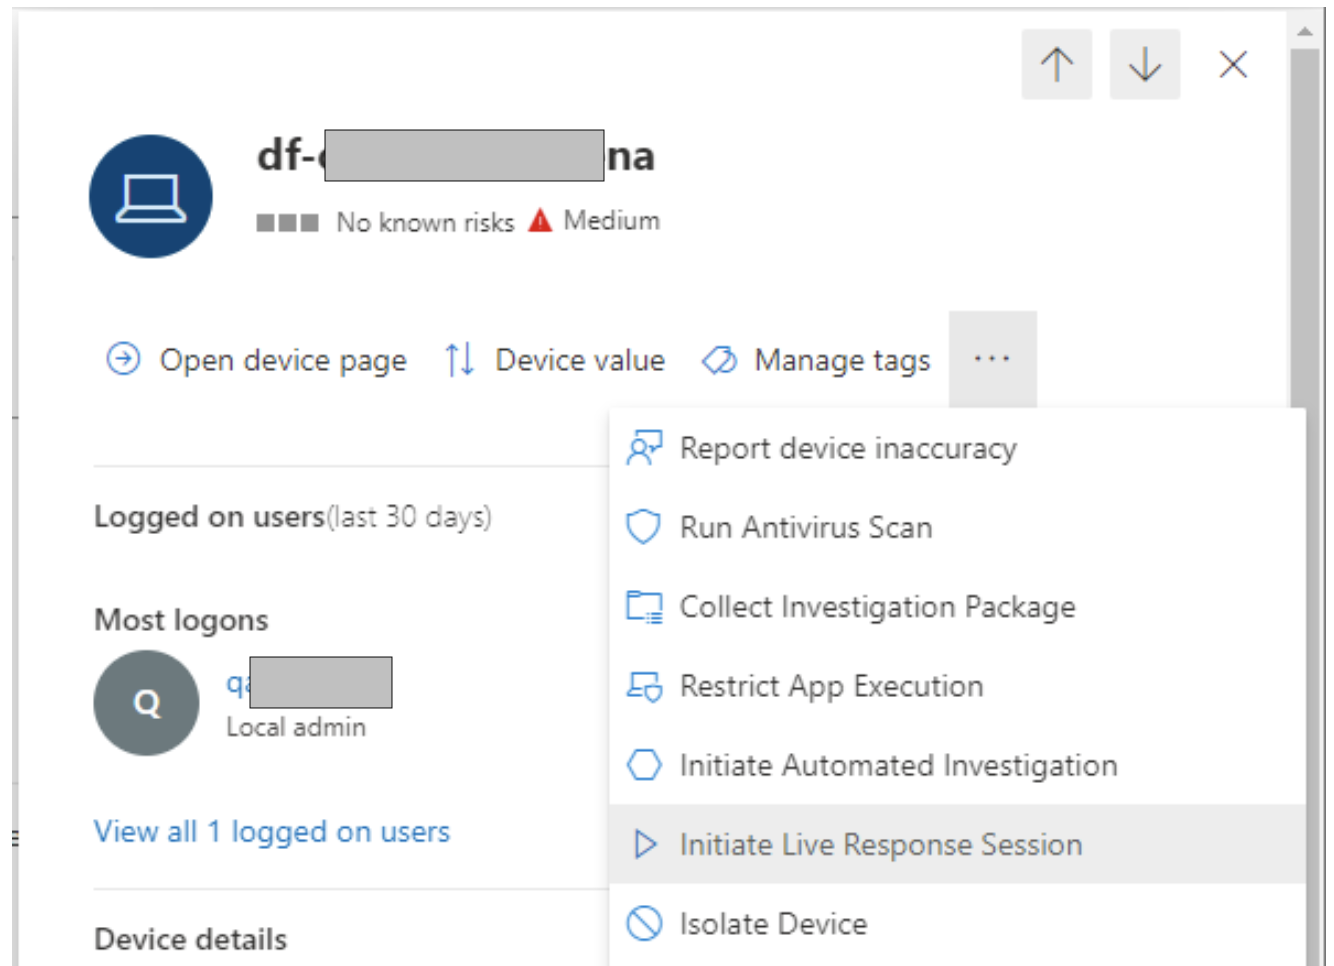
Choose the device you want to create the Live Response session on. You can do this from the list of devices from the left-hand menu. Or, you can do it from an alert.
Choose ‘Initiate Live Response Session’. That will then open a command prompt dialog.
7.1.6.4. Configure Defender for Collections
There are three main steps to deploy the Collector using Defender:
Configure Defender as needed to run unsigned Powershell scripts in Live Response. See the Windows documentation outlined above.
Download and configure the Deployer Powershell script as outlined above.
Upload the script and optional configuration files to the Live Response library as outlined below.
7.1.6.4.1. Uploading to The Live Response Library
You can upload your Deployer script and configuration files to your Defender console so that it can be more easily pushed out to endpoints.
Before uploading the script, we recommend you’ve run it locally to ensure there are no syntax errors.
Nothing in the upload process is unique to Cyber Triage, but we will outline the basic Defender ideas here:
You need to create a random Live Response session in order to upload a file. So, pick a known device and follow the steps as outlined above (Starting a Live Response Session).
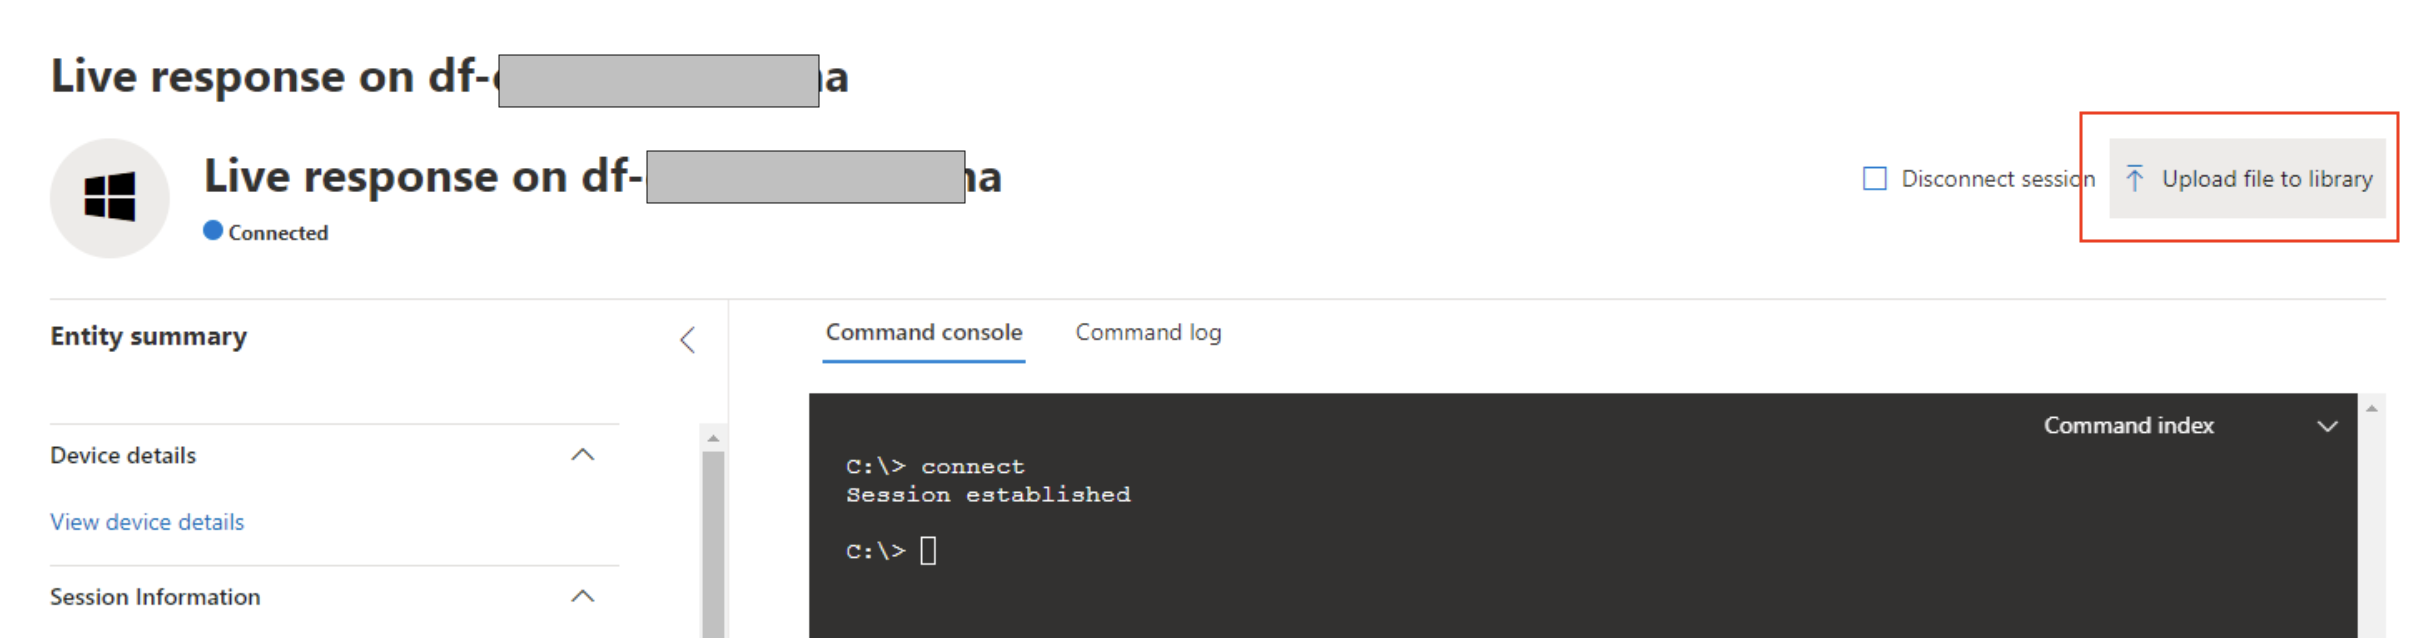
Choose “Upload file to Library” in the upper right.
A dialog will prompt you to pick the Deployer script to upload. Choose to overwrite it if you already uploaded a version.
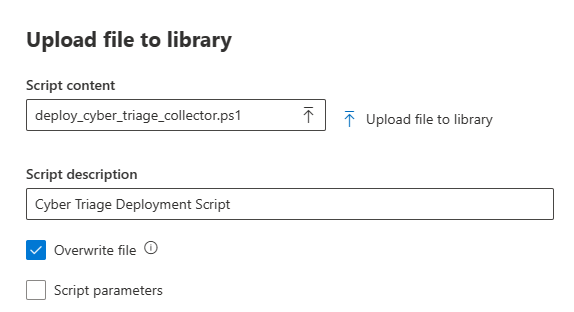
You can also add other files to the library, such as a configuration file for custom file rules or cloud storage configuration. These will need to be explicitly downloaded to the host for each collection though, as shown below.
7.1.6.5. Start a Live Response-based Collection
When you need to collect from an endpoint, then perform the following:
Start a Live Response Session as outlined above (Starting a Live Response Session) on the endpoint.
Optional: If you need to push cloud storage configuration, file set rules, or your own collector executable, then use the putfile command for each file.
putfile CollectorConfig.yaml -overwrite
putfile filesets.yaml -overwrite
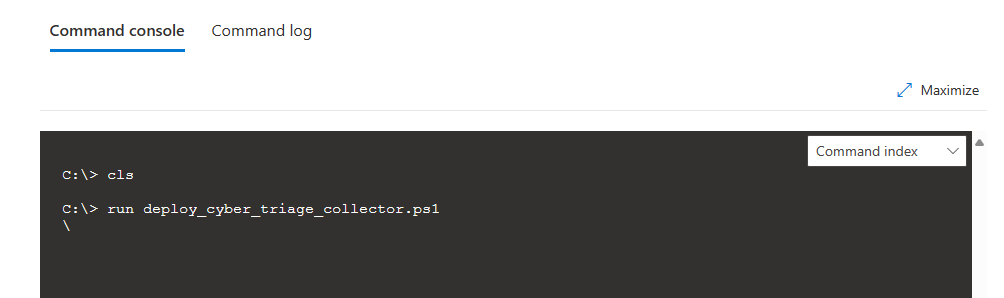
Type in run deploy_cyber_triage_collector.ps1 to launch the process with no additional arguments. If you had additional arguments, you need to use -parameters. Such as:
run deploy_cyber_triage_collector.ps1 -parameters "-skip_file_system_scan"
The Collector will be launched as a background process because Defender will exit after 30 minutes of no activity. The script will show you the process ID and then wait a bit to make sure everything is OK. All output is saved to a text file.
You can check on the status making a new Live Response session and running:
run deploy_cyber_triage_collector.ps1 -parameters "-status"
If you configured the Deployer script to save data to a file, then you need to copy it off the endpoint when it is done. You can do this with the ‘getfile’ command (you may need to create a new Live Response session if the initial one timed out).
The default location to save the data to is C:\windows\temp\file.json.gz.01. Note that the Collector will break the file into chunks, so you may also need to look for a “.02” file.
getfile “C:\Windows\temp\file.json.gz.01”
7.1.6.6. Troubleshooting
Here are some quick references for the Live Response Defender commands that could be useful:
If you are writing to a file or uploading to S3, you can check if the Collector is running or done by checking the output. It will stop growing when it is done.
dir c:\windows\temp\file.json.gz
You can check if the process is still running by getting the process ID when it launches and then using the ‘processes’ command.
processes -pid <PID>